Every prototype needing human input starts with the same chore: wire loose
buttons, LEDs and a potentiometer before testing the interesting part. So I made
that recurring mess permanent.
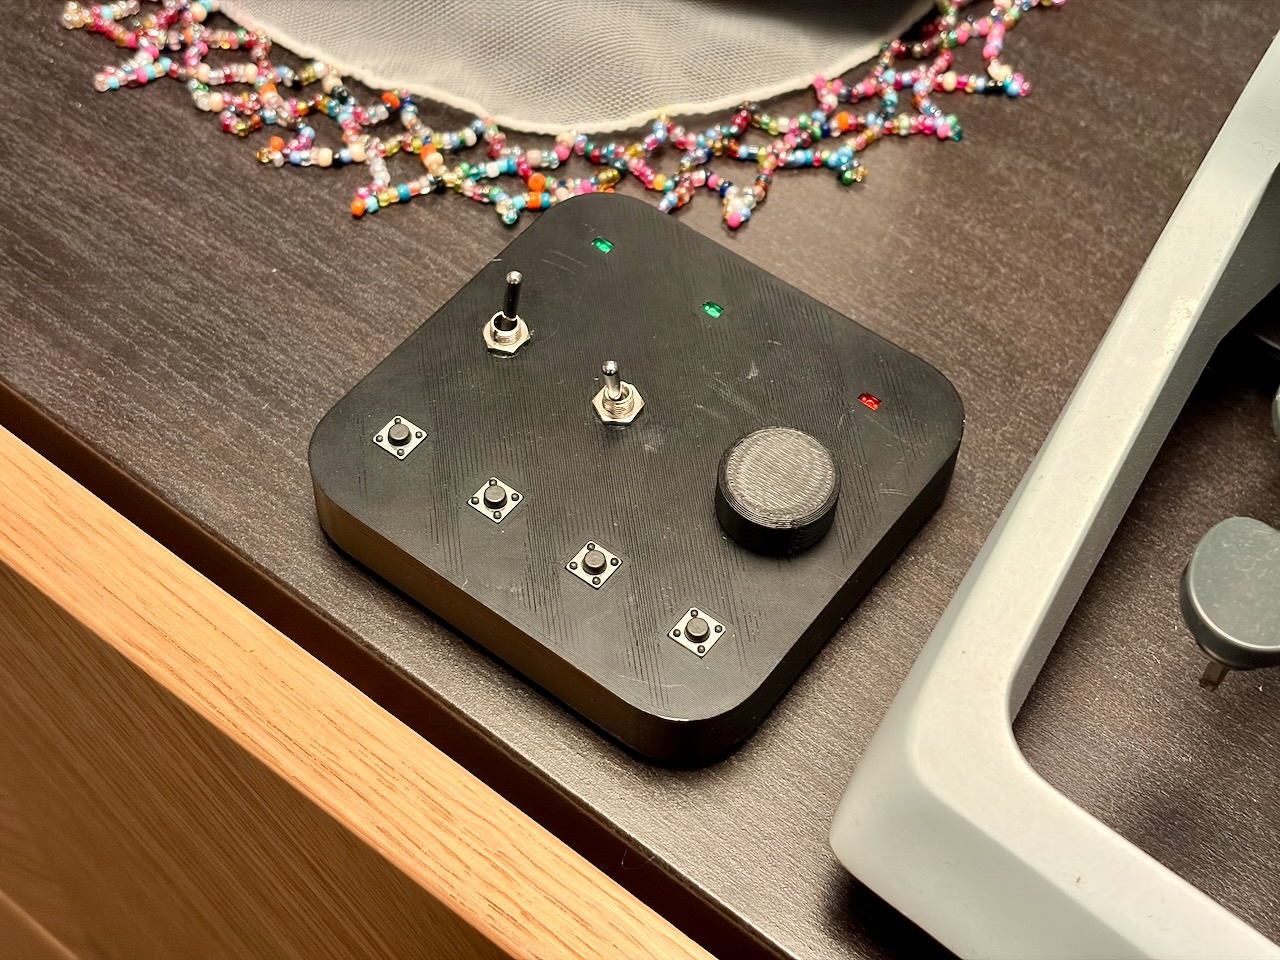
This scrap-built, 3D-printed panel has four momentary buttons, two toggles, one
potentiometer and three LEDs. Ten controls and indicators connect to any
microcontroller through ordinary jumper wires. It is a reusable physical
interface I can bring to a prototype instead of rebuilding inside it.
The first version: entirely scrap-bin electronics in a printed shell.
Thiel then admitted that he had considered rocket reusability
inconceivable. SpaceX did it anyway. The distinction is useful:
skepticism costs nothing; a specific public prediction creates a ledger.
What follows is the strict ledger: public dismissals from named industry
leaders or people with exceptional access to relevant expertise, paired with
measured outcomes. No deadline bets and no viral anecdotes that cannot be
traced to a contemporaneous source.
Around the middle of 2019, I started making the equipment around me speak one
electrical language. I built a USB Power Delivery sink controller, then
converted more and more of my
equipment to USB-C. The point was not the connector itself. It was being
able to reach for one cable and one power supply with some confidence that
things would work together.
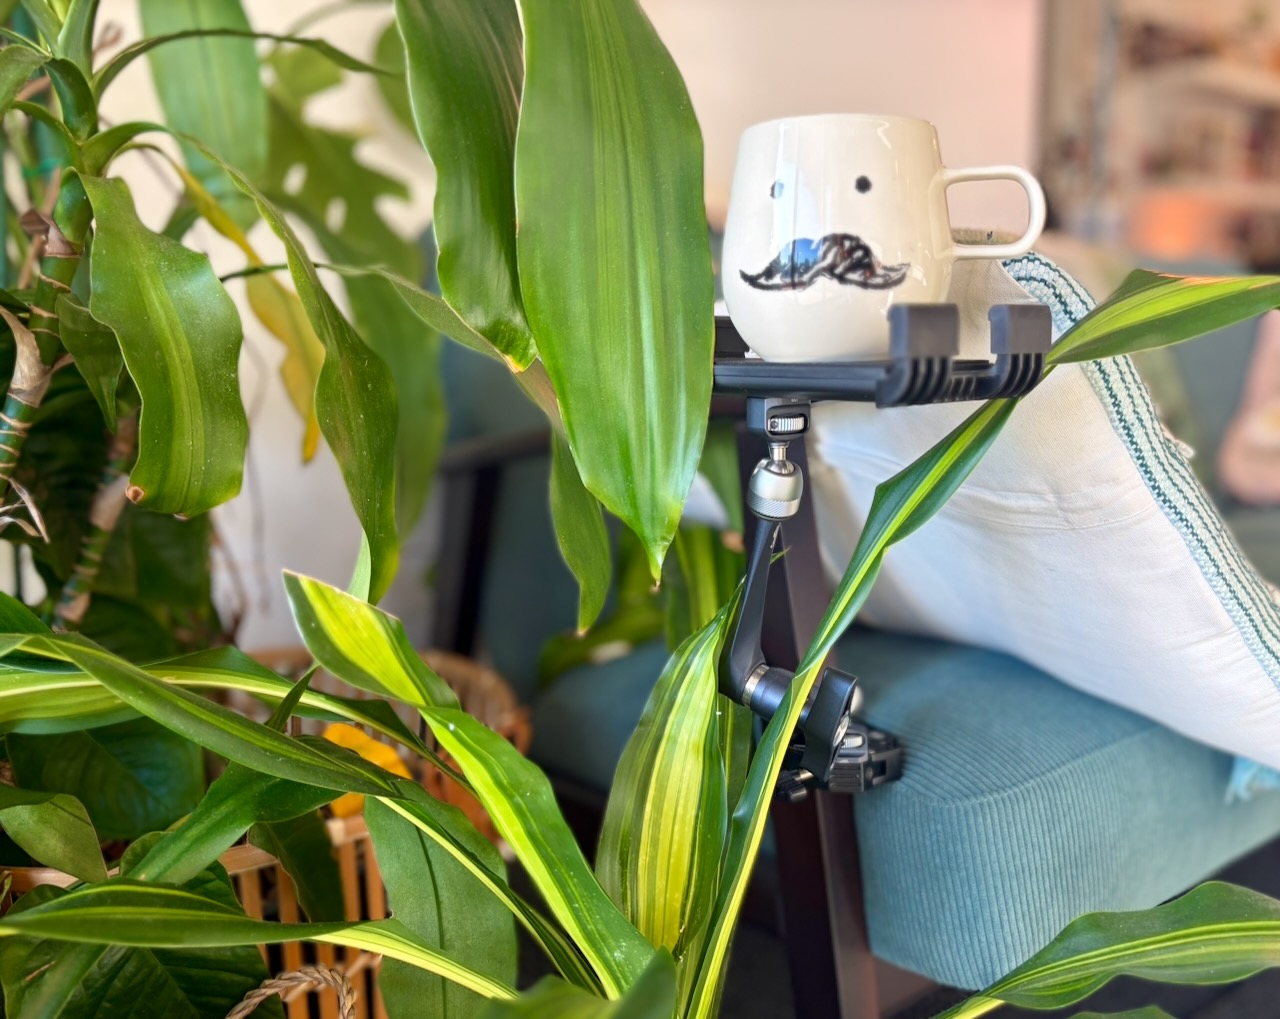
Quite by accident, I have done the same thing mechanically. The interface is
the ordinary camera tripod thread: 1/4″-20 UNC. Once I noticed the absurd
range of clamps, ball heads, quick-release plates and articulating arms built
around it, I stopped treating them as camera equipment. They are a mature box
of mechanical parts that happen to have escaped from photography.
No camera in sight. An arm keeps my cup within reach without consuming a
surface.
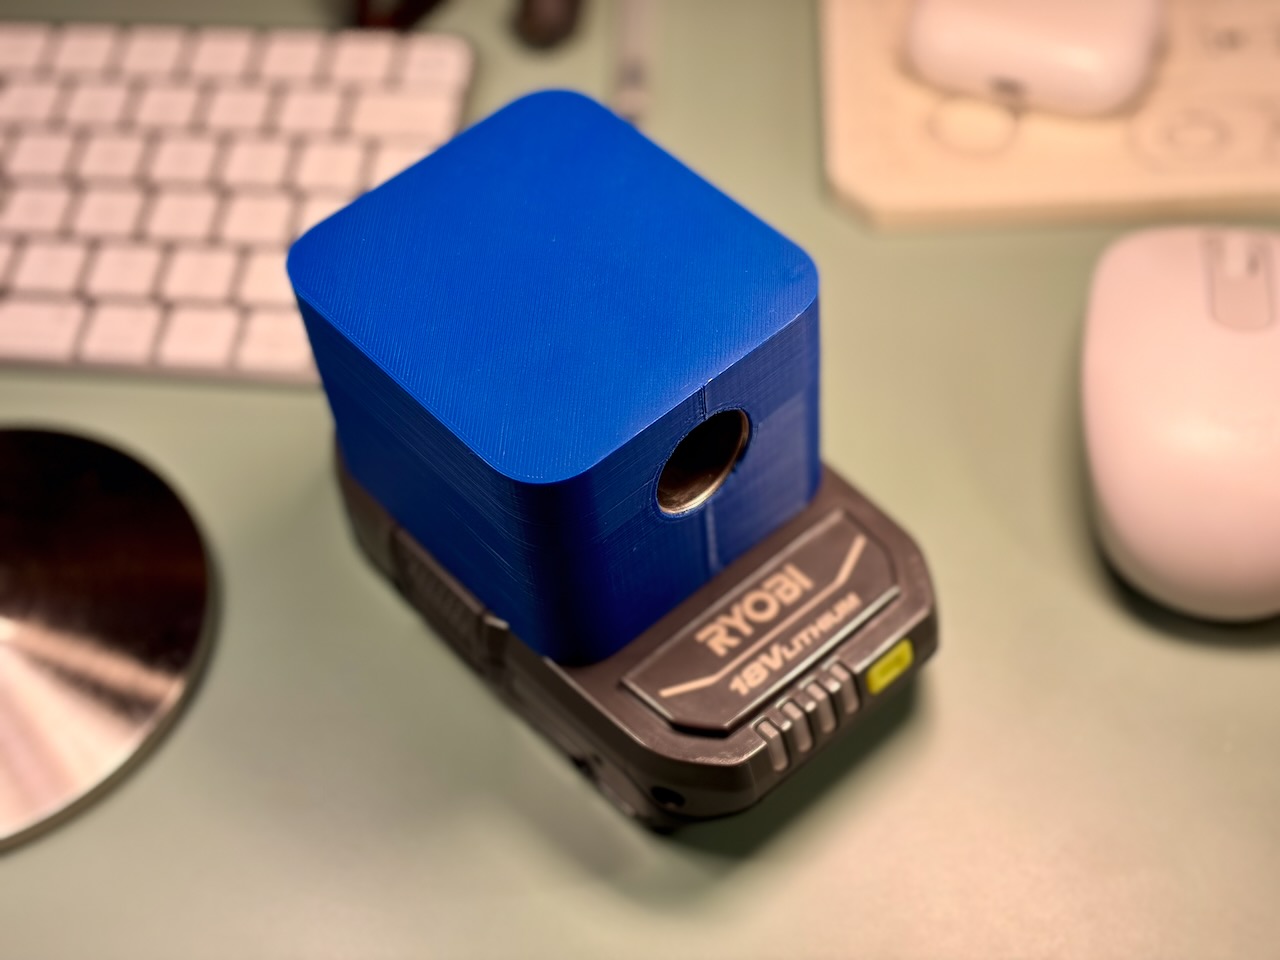
I wanted an easy way to get useful power out of my Ryobi batteries without
building another power supply. So I put a car cigarette lighter socket in a
simple 3D-printed attachment and wired it straight to the battery terminals.
That’s the entire circuit.
The socket is connected directly to the battery terminals. There is no voltage
conversion hiding inside the print.
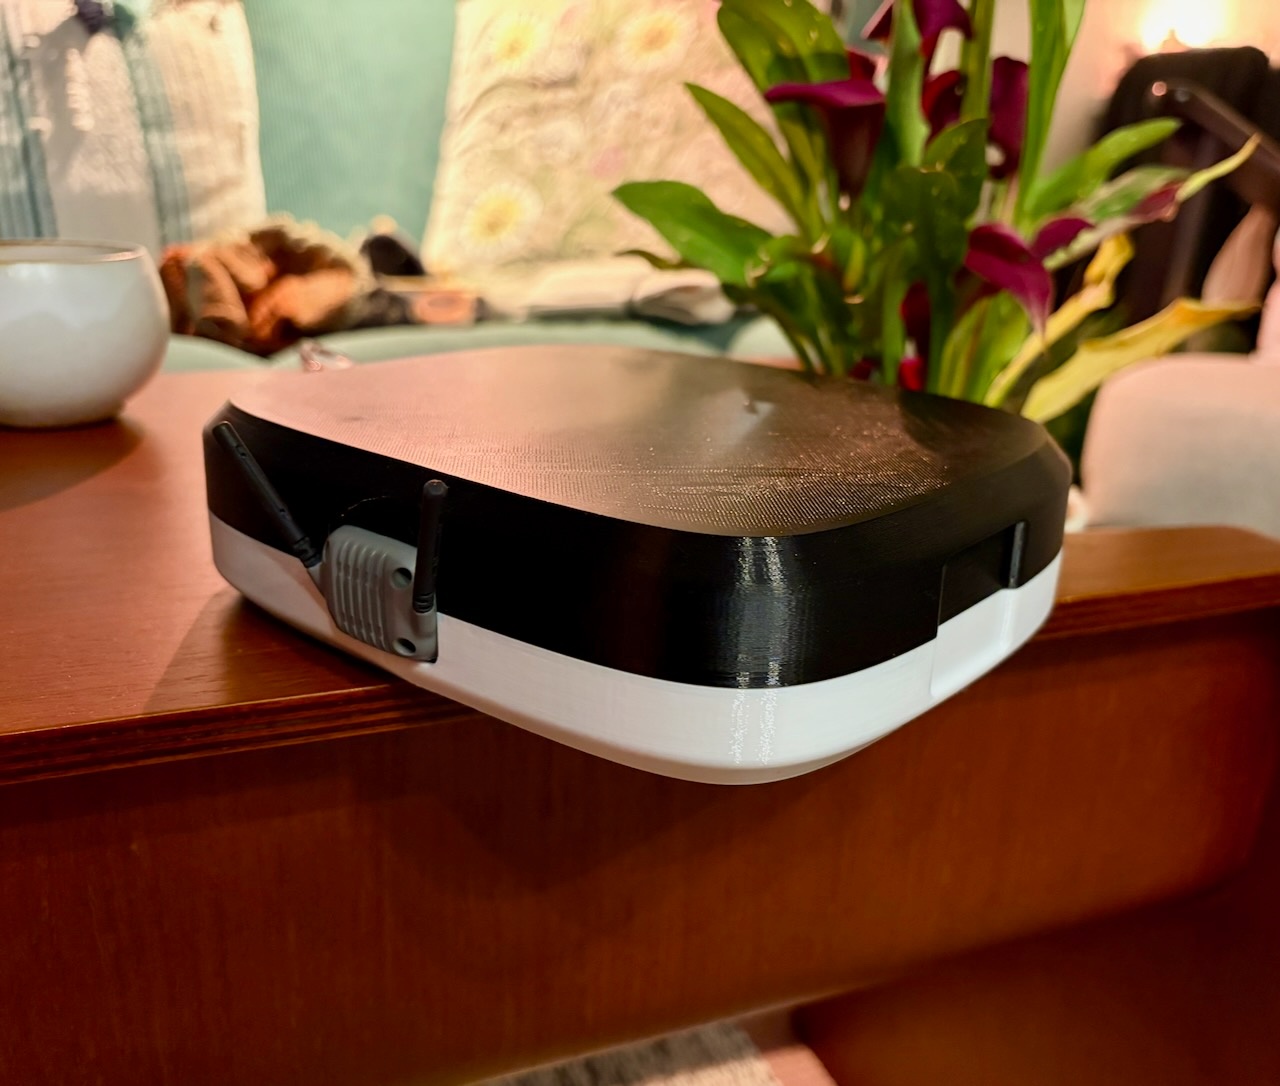
I wanted a DJI Neo 2 case that could disappear into a backpack without the
drone getting crushed by everything piled on top of it. The result is a
3D-printed case measuring 163 × 185 × 47 mm, including room for the drone and
the small spares I actually need. It may be the smallest crush-proof case for
the Neo 2 out there.
The flexible radio-module antennas remain outside, avoiding the empty case
volume that enclosing them would require.
I’ve posted enough scattered AI tips on Slack that it’s time to put them in one
place. These are operating principles, not commandments. Nothing applies
everywhere; don’t blindly follow any of this.
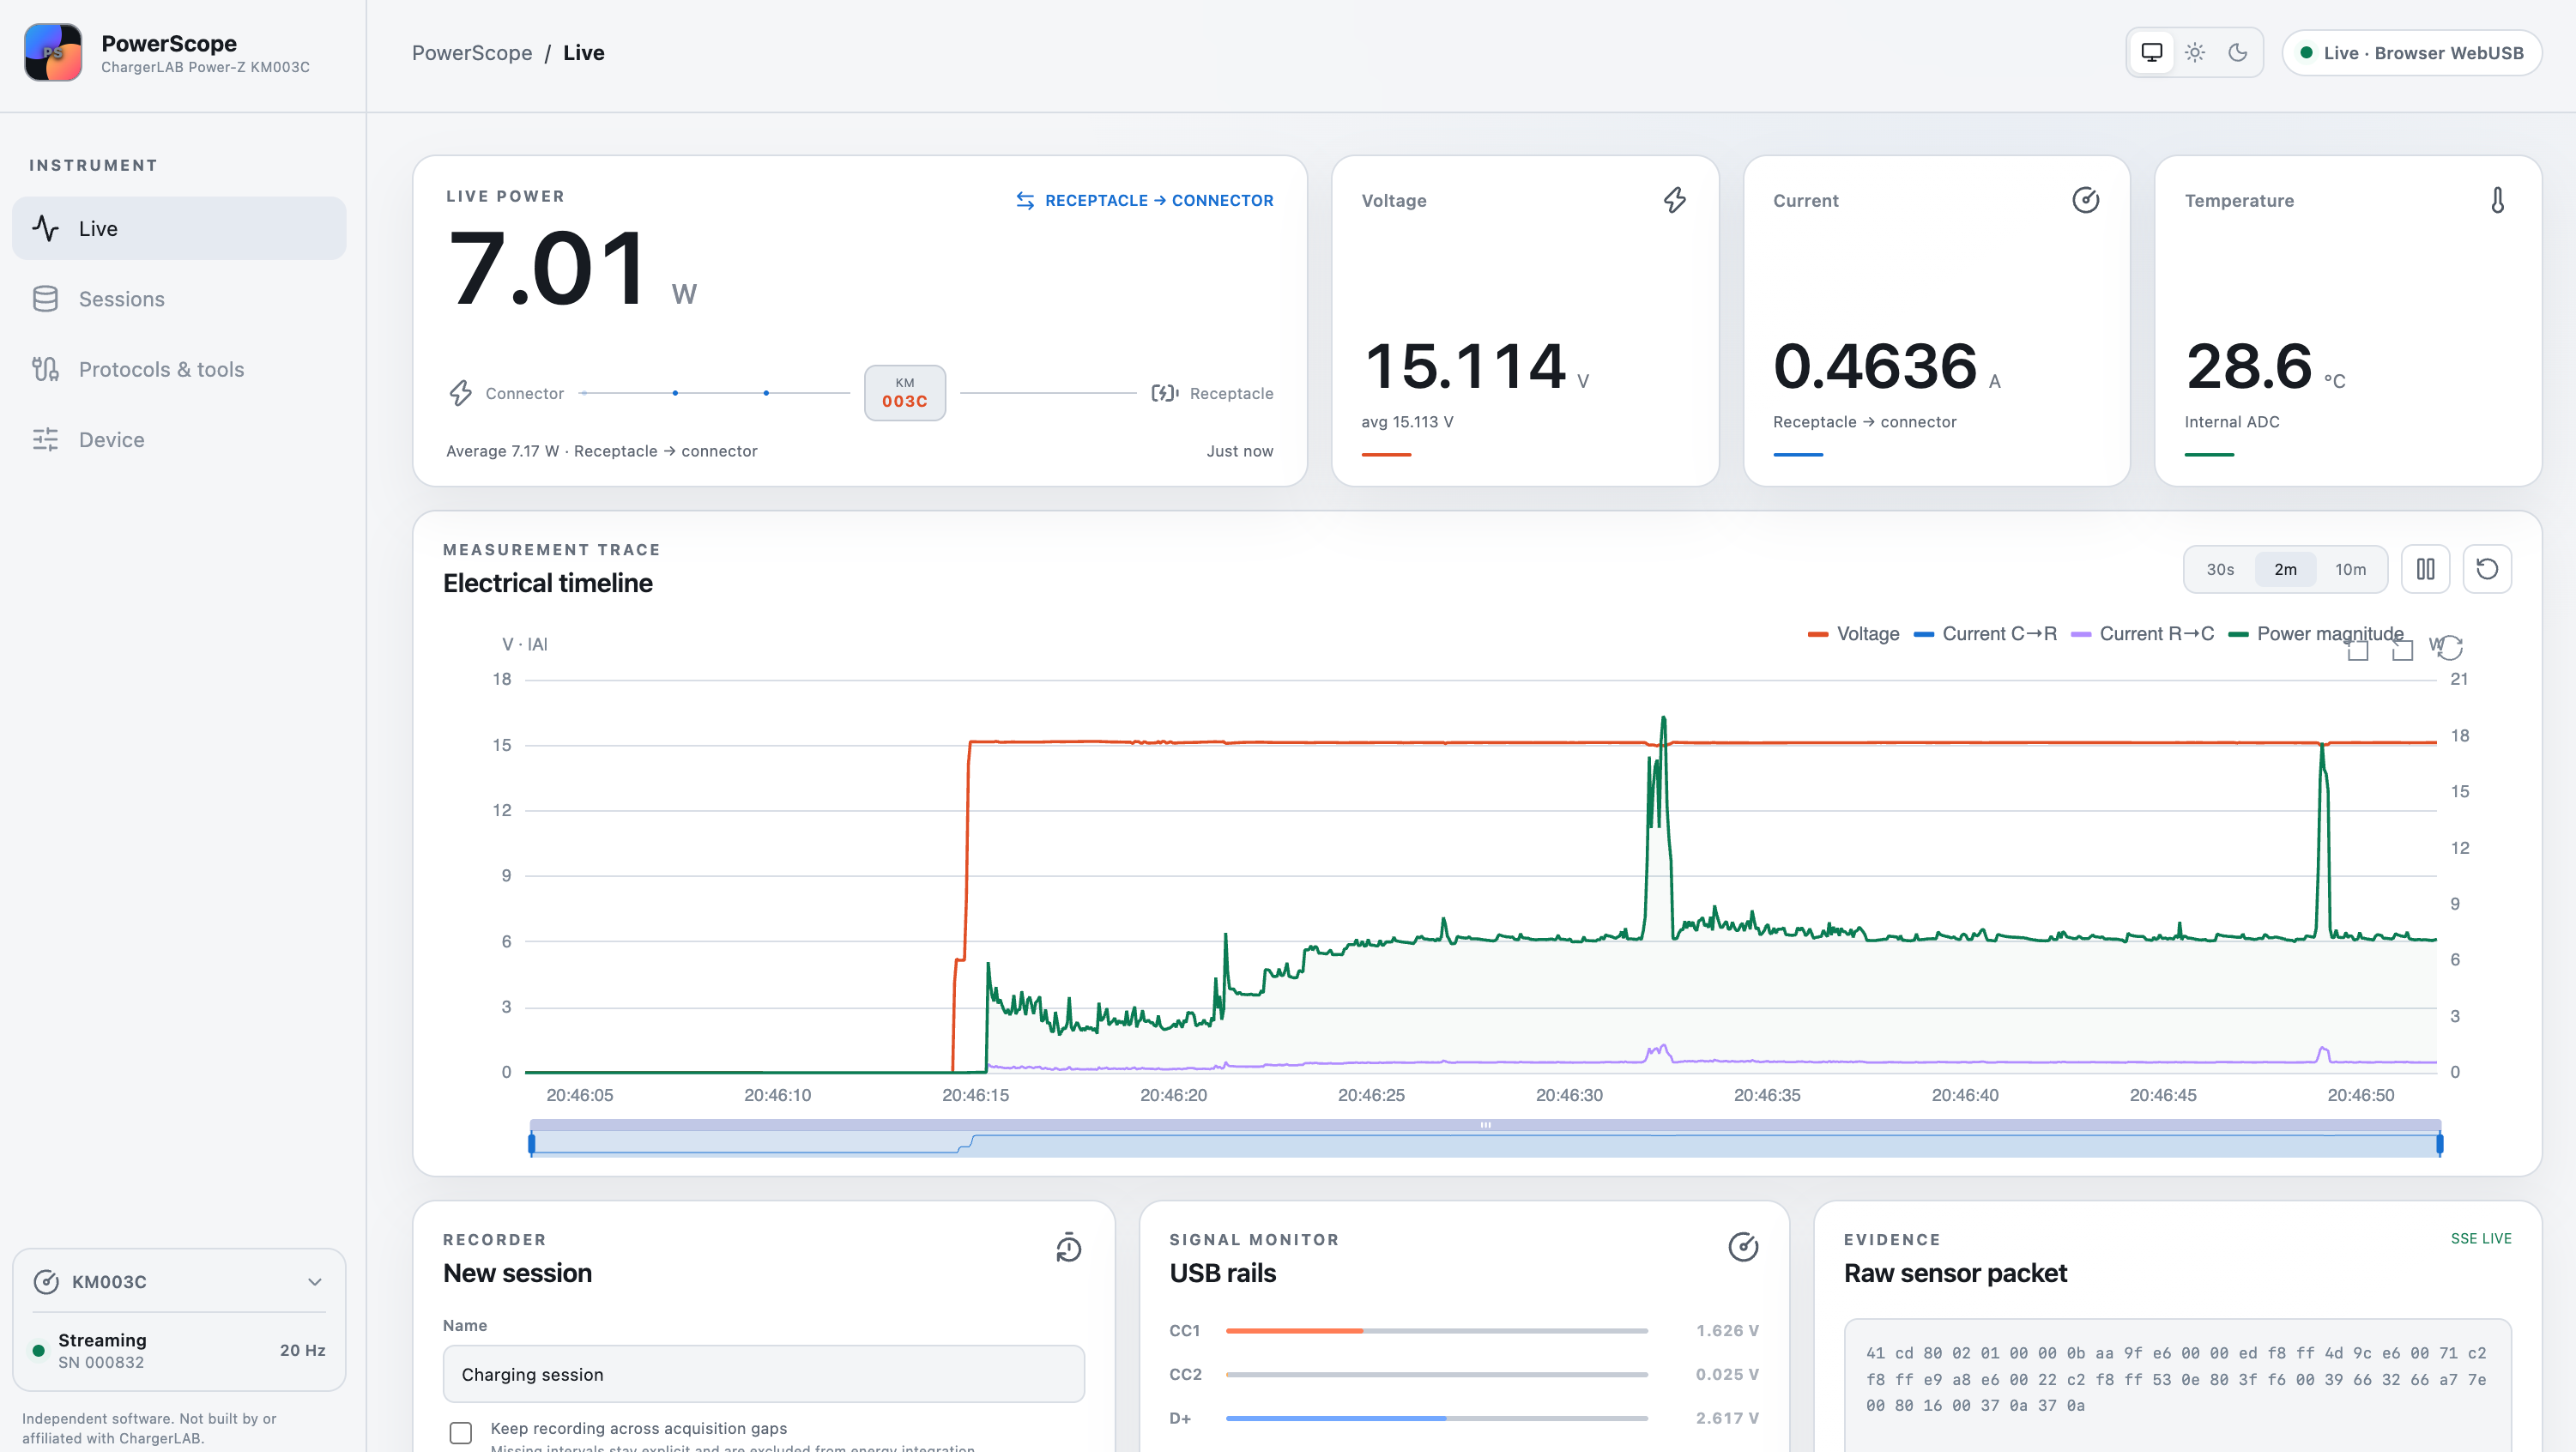
ChargerLAB only provides a Windows app for the Power-Z KM003C. I wasn’t going
to install a whole separate operating system just to use one USB power meter,
so I built PowerScope. It graphs live voltage, signed current, power,
temperature and USB rails at up to 100 samples per second; records sessions;
exports CSV and JSON; and captures and decodes USB Power Delivery traffic and
cable E-Markers.
PowerScope reading a KM003C directly from the browser — it’s my iPhone charging
Everything runs locally in the browser. WebUSB talks to the meter, Web Serial
provides its separate control channel, Go/Wasm parses measurements and USB-PD
traffic, and IndexedDB stores recordings. The site serves static assets;
device data stays in the browser.
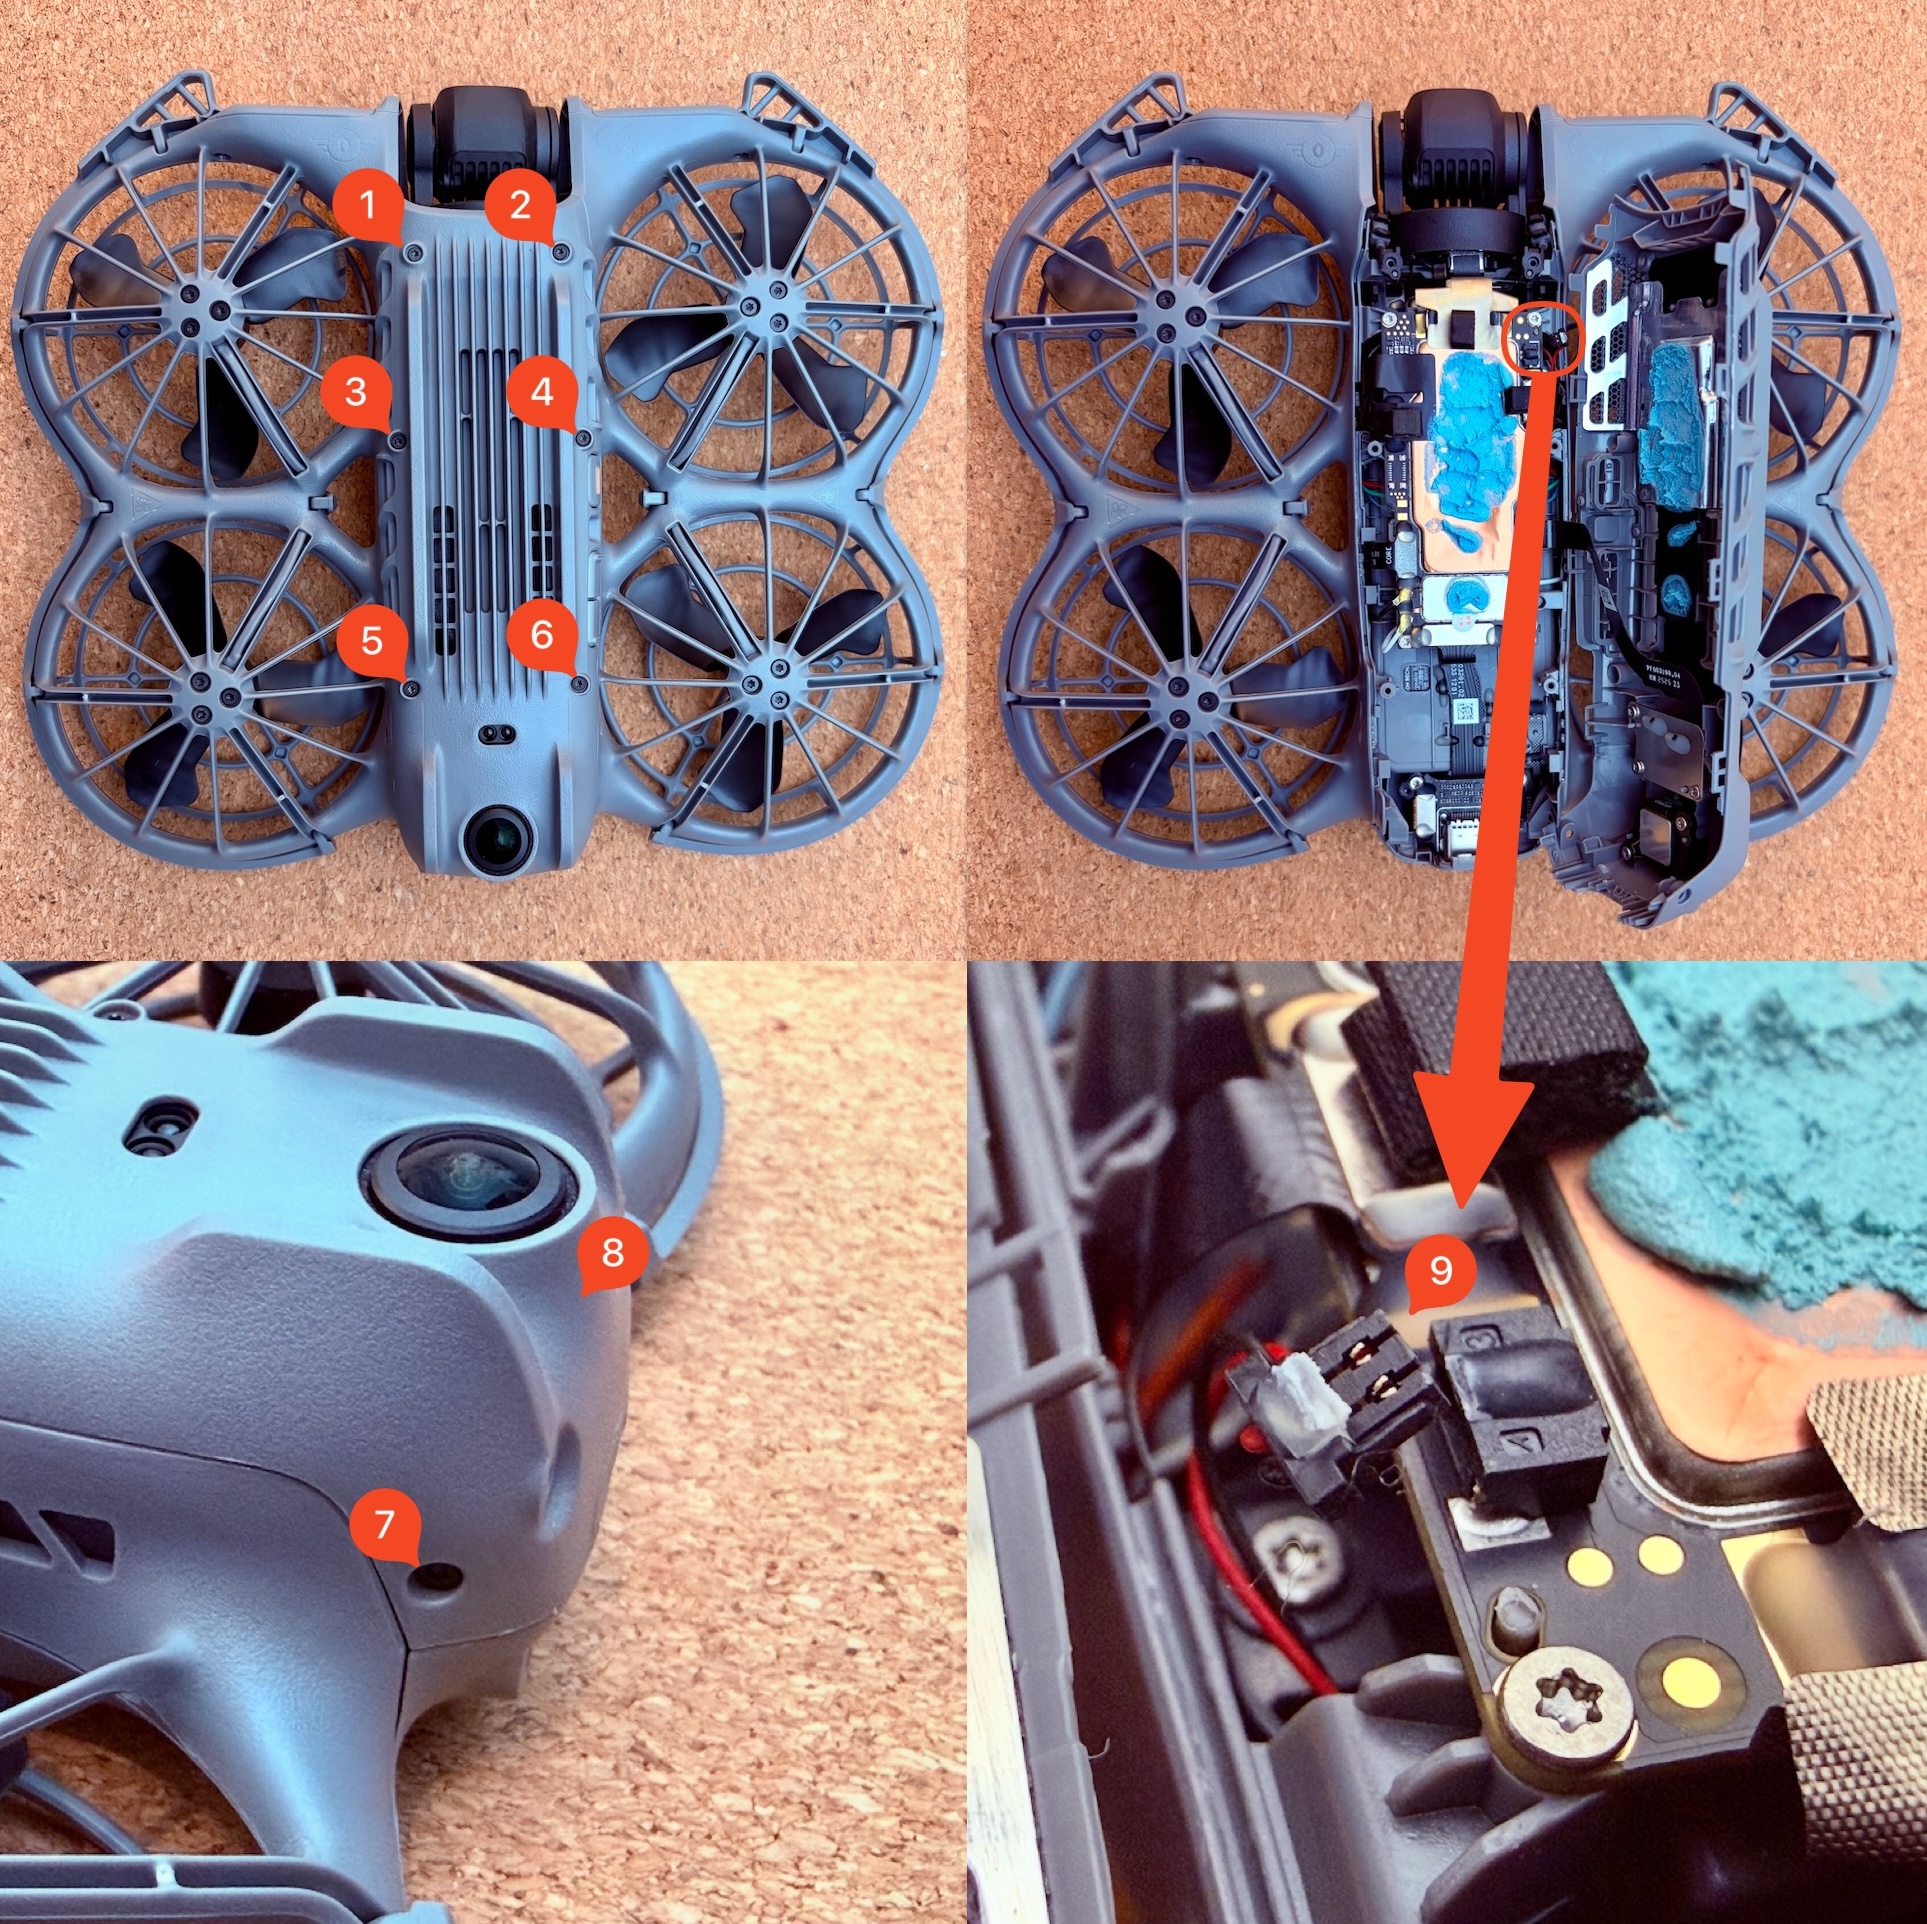
The DJI‘s Neo 2‘s onboard speaker is one obnoxiously loud piece. So I opened it
up, unplugged the speaker cable from the main board, and snipped off the loose
wire and now it’s blissfully silent (except the little startup music that plays
out of the motors!).
Speaker connector location.
Gotcha: preserve the blue thermal putty. It is a soft
gap filler,
not ordinary CPU paste: it bridges uneven power electronics to the shell,
whereas paste is too thin and a fixed-thickness pad may not contact everything.
Keep it clean and press any displaced material back into its original footprint
with a clean plastic tool before closing the shell. If any is lost or
contaminated, do not fly until the same coverage has been restored with a soft,
electrically insulating putty such as
iFixit Thermal Putty
(the exact DJI material is not documented); poor contact can overheat the motor
controller and cause loss of propulsion.
Loosen the 8 T4/T3 screws shown in the photos.
Use a thin plastic prying tool to lift the bottom panel off. Be careful
not to break the clips inside.
Use a knife to cut the glue securing the speaker plug along the edge of
the connector and the plug.
Remove the speaker plug.
Optionally, snip off the loose wire for a cleaner look.
Ensure remaining wire is secured to the chassis so it doesn‘t dangle around — you can glue it.
If you like this sort of quieting hack, Visual Beep
is a similar one with an IKEA clock.
TL;DR List of best health insurers in Australia based on publicly available statistics.
I recently decided to up my health insurance from the bare minimum required by
the government here in Australia. It proved quite difficult to find which insurer
is the best for my state. Now the “best” insurer is a loaded term. It depends
on your needs, your age and so on (and for that, you should see other resources.). But that’s the
matter of coverage. I wanted to know which insurer was the easiest to deal
with and actually cared about making members’ lives easier. You may be
thinking how naive I must be to think any insurance company cares about their
members, or any business for that matter. If that’s you, this is not the post
for you.
I decided to look at publicly available statistics instead of relying on anecdotal
reviews from people I know and those online. That’s because they are usually
biased towards the negative as happy people don’t usually go out of their way
to write a review (except me). I also wanted to know which insurer is the best
for my particular area. The result is in a Github
repo which I plan to add to over time as I learn more about various
related stats.
As a summary, here are your best options per state:
Over the past two years, I have gradually increased my use of home
automation in our small city apartment. I started with an IKEA TRÅDFRI
light and a button, and today have over 40 devices doing useful things,
saving electricity and making our living more pleasant. I won’t lie: I
have done a lot of this just for fun and learnt quite a bit in the
process. But if it doesn’t eventually result in utility or aesthetics,
then I get rid of it. I can’t stand keeping frivolous stuff in the long
run.
In this post, I’d like to describe the architecture of our home
automation and specifically talk about how a graceful degradation of
capabilities is crucial to the reliable operation of devices at home,
which itself has important safety implications. Unfortunately, most
people do not have access to a setup like mine, and it takes an industry
and perhaps regulation to streamline these fundamental capabilities into
smart home devices. On the other hand, if you have the time and the
skills, this post should have some useful tips.