Debrick WRT54GL using Raspberry Pi (JTAG bit banging)
I remember using WRT54G router when it first came more than a decade ago and back then, my first attempt to upgrade the firmware resulted in bricking it. It wasn’t until I went searching for how to make it OK again that I discovered an entire community of hackers making this $100 device do incredible and magical shit.
Fast forward to few days ago and while going through my stuff, I came across this Samsung HDD which had a very familiar looking chip on it—an SDRAM! Aha! I remembered I had seen that chip elsewhere, on my very own WRT54GL. I quickly googled the part numbers and found them to be pin compatible. So I rolled up my sleeves and got busy desoldering the chip off the HDD and soldering it onto the router. I fucked up more or less and ended up bending the chip and knocking one of the pads off (albeit an NC one) on my router. I finished the job nonetheless. Already hopeless, I powered it up and saw nothing but flashing power LED and all on ethernet LEDs. Couldn’t be worse.
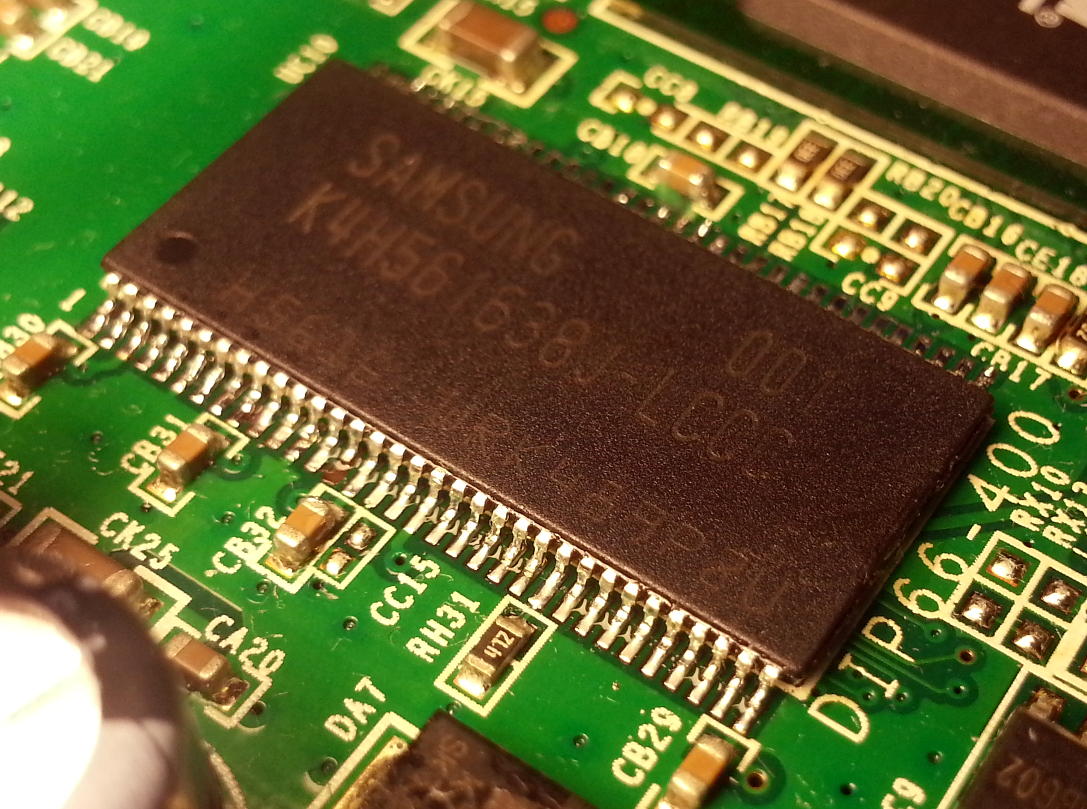
Samsung K4H561638J-LCCC. Although not obvious, I managed to bend the chip and the outer pins must be under great mechanical stress right now. Also note the missing pad next to the third cap from the left.
Once again, in search of a solution, I found a very popular utility called HairyDairyMaid WRT54G v4.8 and later a more recent fork of it called TJTAG which could program the non-volatile flash on the board through JTAG header. I would use it to reconfigure the SDRAM config parameters (hoping that was my issue). But there was a catch: I had to have a PC with parallel port. Who the hell does these days?! But I knew all the programs using parallel port use bit-banging to get the job done and yet another bulb went off in my head — Raspberry Pi. It has GPIO pins and should be perfect for this.
After a little bit of hacking, I added Pi support to TJTAG and it worked like a charm. I could read and write the onboard flash just fine and rather fast (e.g. reading the entire 4 MB flash took about 7 minutes). This story however does not have a happy ending. No matter what I did, the board didn’t boot. The sun finally set on my 6 years old router. I haven’t given up yet and ordered new parts to try again but I’m highly certain that I’ve damaged the PCB. (I finally revived it. Bought a new SDRAM chip for $8 and it’s rocking my world now).
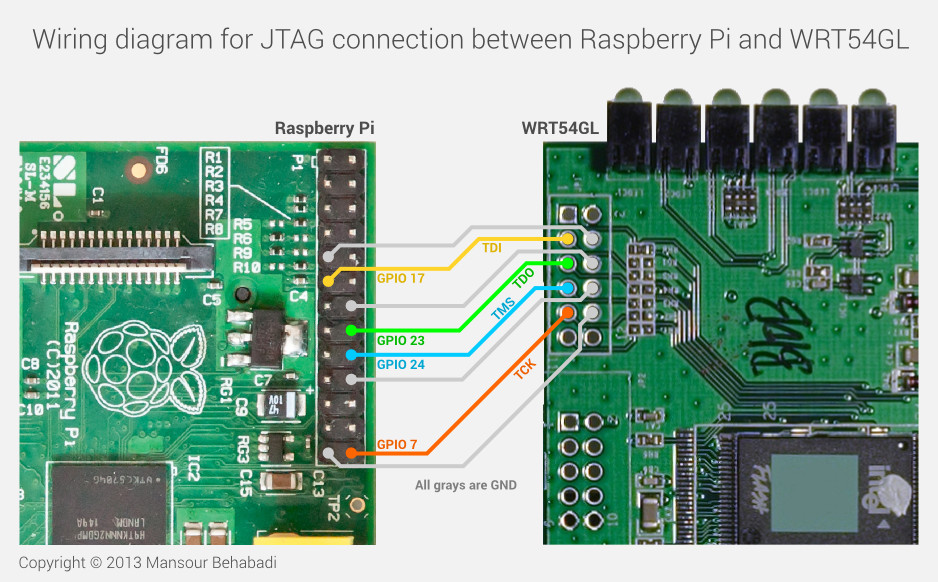
Wiring diagram between Pi and WRT
See the tjtag-pi github repository for information on how to build it. There are many guides elsewhere describing how to use this tool to restore your router to an operational state. For more just google for it. There is a document that comes with this program as well (not written by me) — be sure to read it before doing anything.
Huge credit to rcaron for finding issues with original wiring and thouroughly testing various configurations to find the best one.