A Folding Stepladder from Fence Timber
I almost never copy a design this closely. Karl Malmvall’s Step stepladder for Design House Stockholm gave me very little reason to redesign it. The mechanism and general proportions were almost exactly what I wanted. The two actual ladders I encountered were another matter.
So I built my own from hardwood fence timber. About A$70 in materials, several weeks of work, and a nearly year-long pause in the middle. It still needs finishing, but it already feels considerably sturdier than the ones that started this.
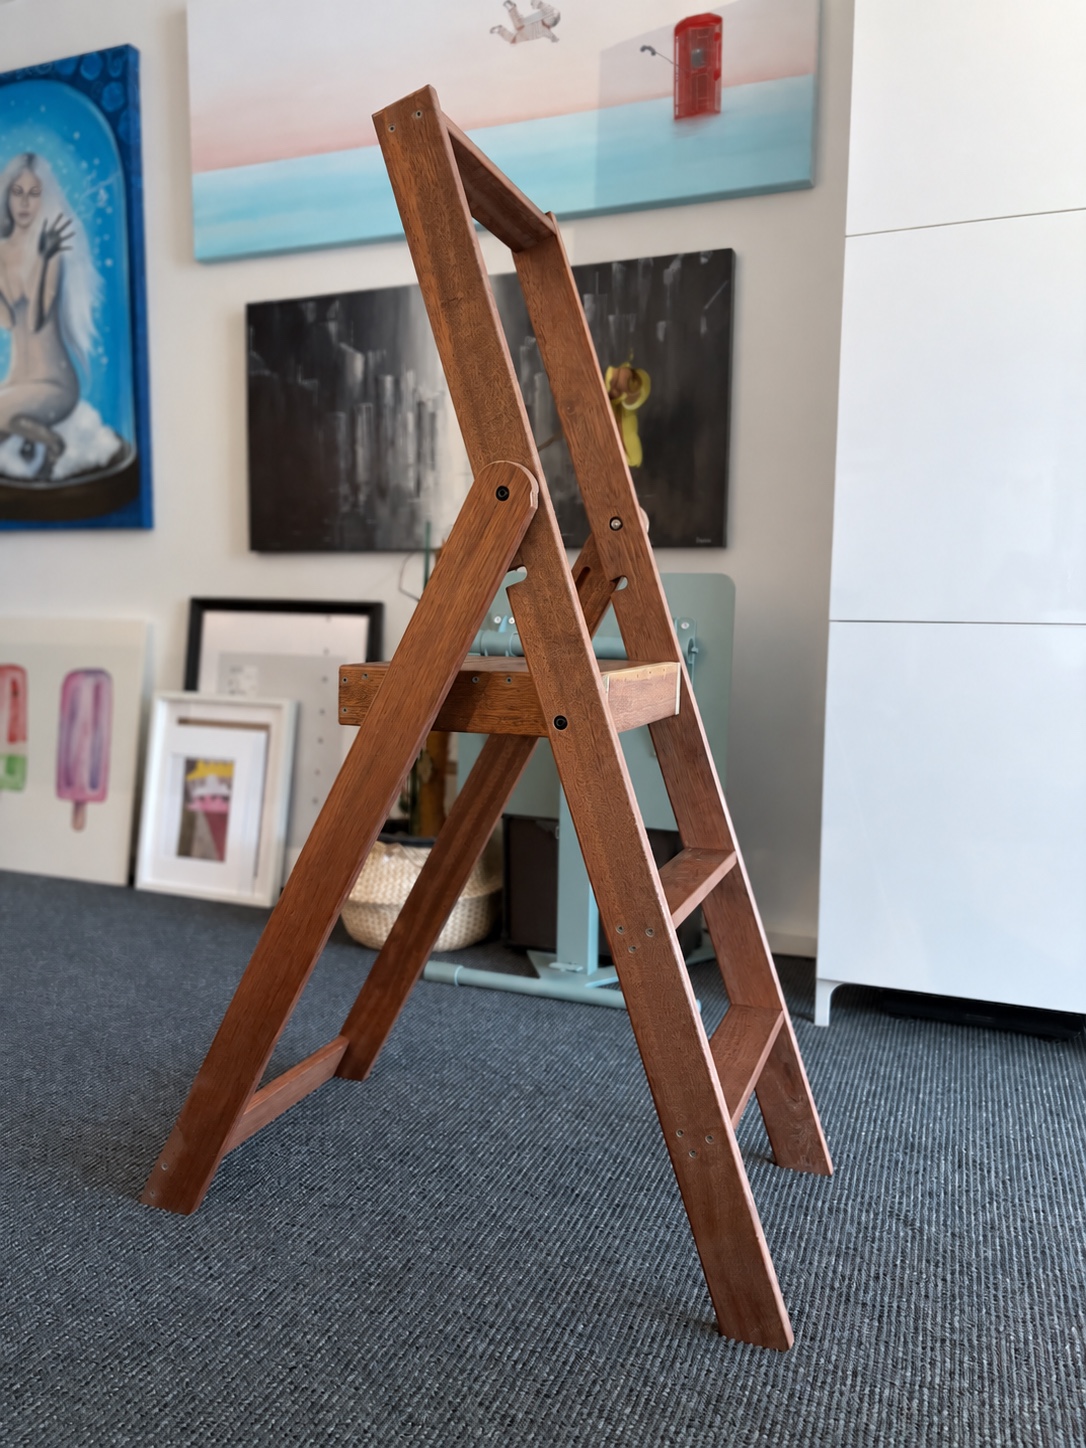
Built, but not quite finished. Sanding, probably more oil, and rubber feet are still on the list.
A design worth copying
I first saw the original at Potts Point Bookshop. I was fascinated by the folding mechanism and the way the whole thing looked. Then I stepped on it. The joints were loose and the ladder moved laterally, left to right. The lower steps also felt too narrow for my liking. A lovely object, and a flimsy thing to stand on.
Later, I found another at the giftshop of the new Art Gallery of NSW. Same problem: loose joints and sideways movement. Whatever had happened in production, assembly or use, neither example inspired much confidence. I looked it up online. Over A$1,000.
Fuck that.
I still liked the design. Enough to copy the mechanism and stay close to the general dimensions, with a few changes to suit my hands, my tools and the timber I could actually buy. Inventing a different folding mechanism would have been work for its own sake.
Start with the timber
Bunnings had pre-oiled hardwood fence timber for about A$8 a piece: 1,500 mm long, roughly 70 mm wide and 20 mm thick. I bought seven. These weren’t the timber dimensions used in the original, so copying the overall idea still left a fair amount of design work.
I modelled the ladder in Onshape around that stock, working through the dimensions and simulating the moving joints until the folding motion worked in CAD. With the legs, platform and slots all moving relative to one another, being able to check the assembly before cutting anything was worth the time.
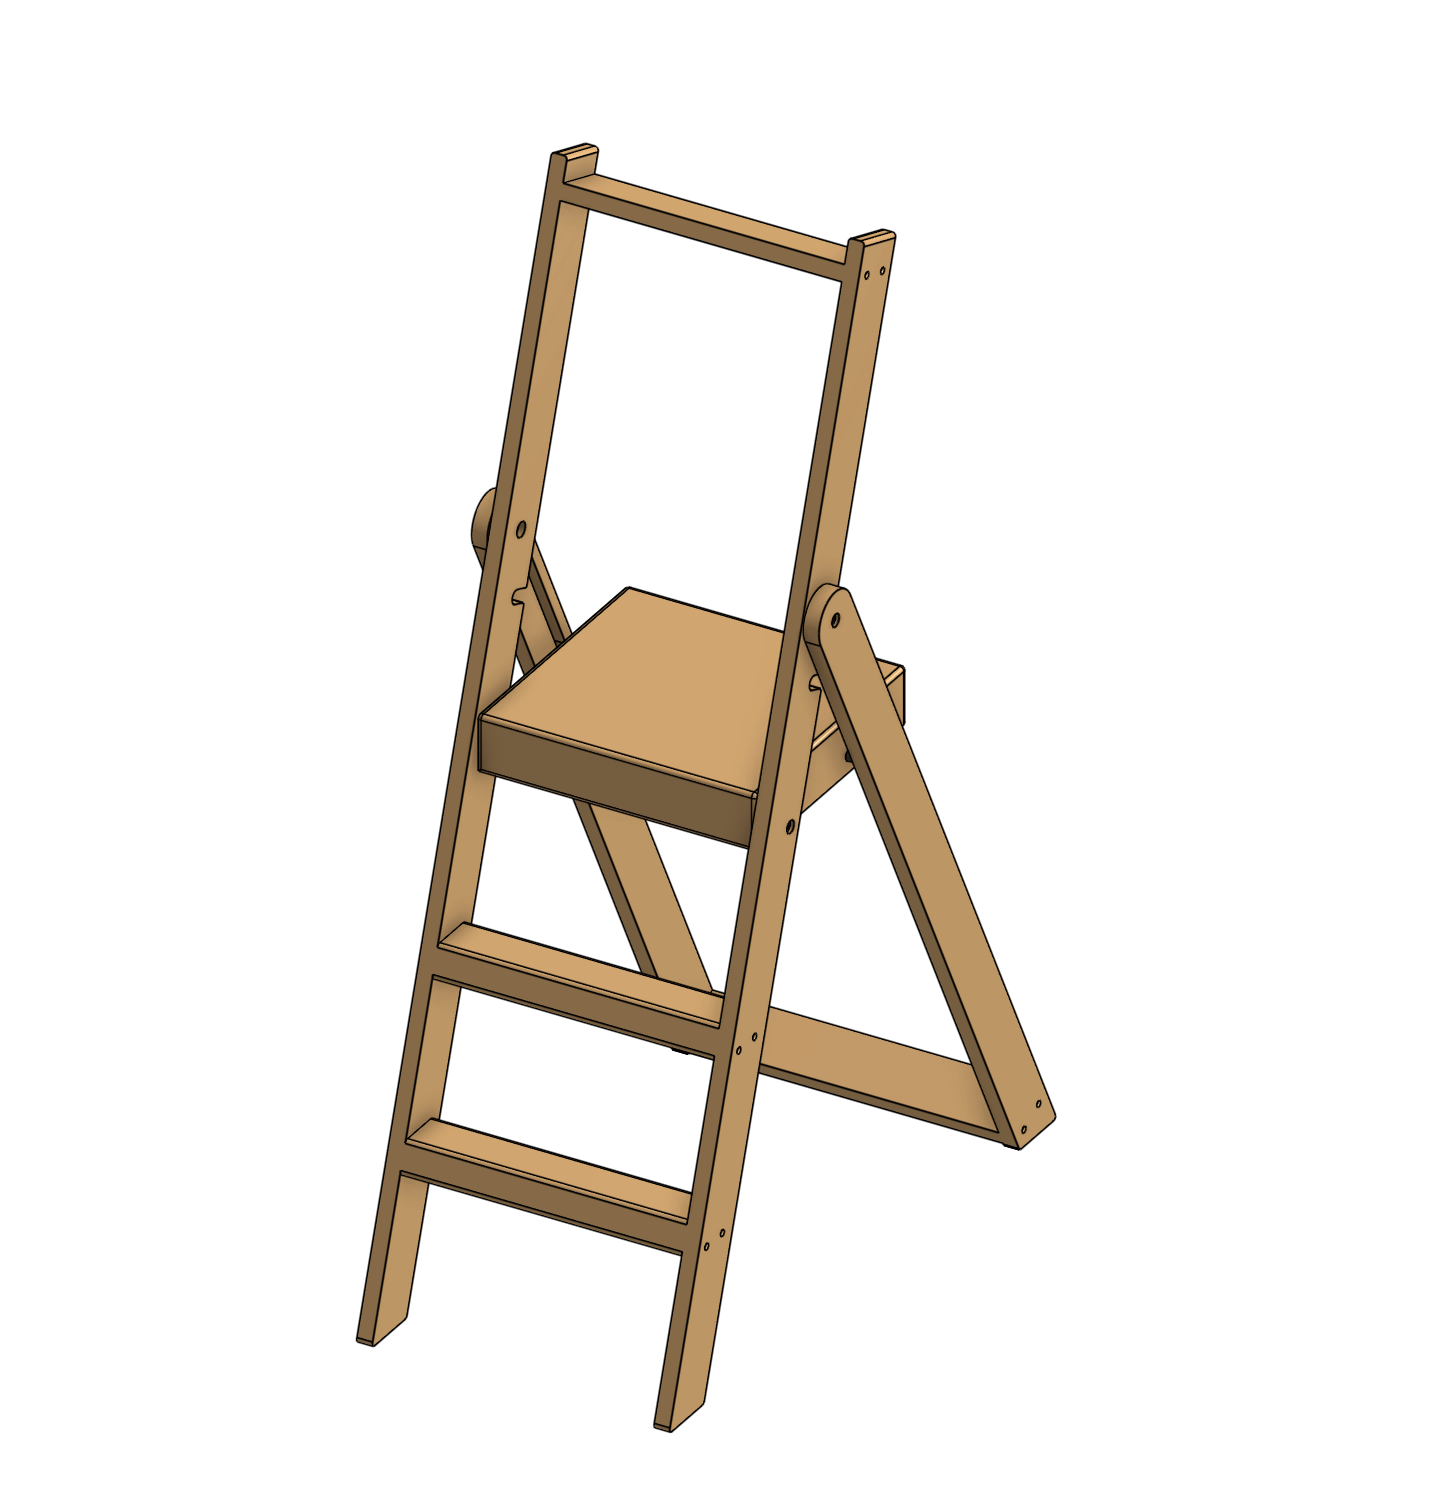
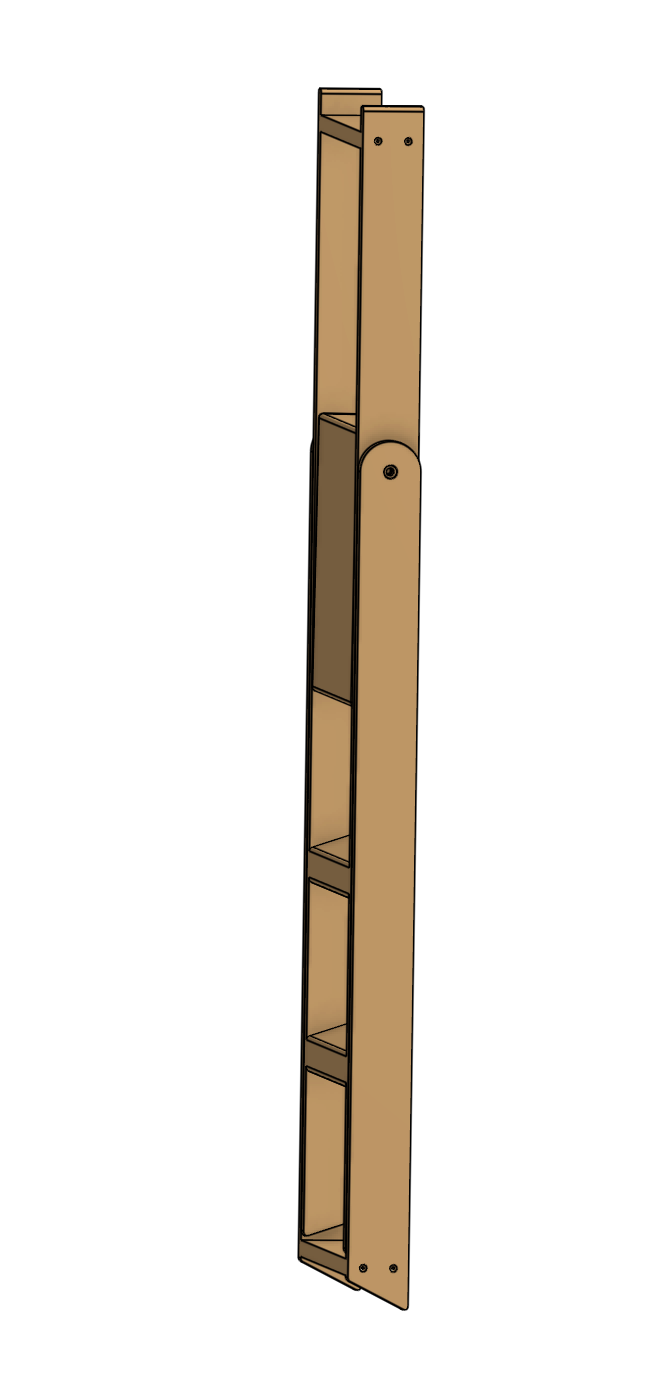
Open and folded in Onshape. The platform turns upright and the rear frame closes against the front.
Then I left the project alone for almost a year.
A workshop that has to fold away
In the meantime, I bought a Festool track saw, router and sander. Among the best damn purchases for woodworking. I wanted accurate parts without spending the whole project fiddling with how to make each cut.
The other constraint was the workshop. I live in a small one-bedroom city apartment, and the bedroom already contains a king bed. A YouTube video of a bloke strolling around his football-field-sized garage is of limited assistance here.
I found a BORA Centipede work stand with a folding dog-hole top and folding legs. Solid, sturdy, cheap, and something I could put away. A few inexpensive dog-hole workholding accessories from Amazon made the setup much more useful. Holding a piece where it needs to stay is a substantial part of making an accurate cut. I was very happy to stop improvising that part.
Once I had somewhere to work, I generated technical drawings from the Onshape model and started cutting. The router and track saw are loud, so those jobs had to happen during the day. I chipped away at the build over several weeks, a little at a time.
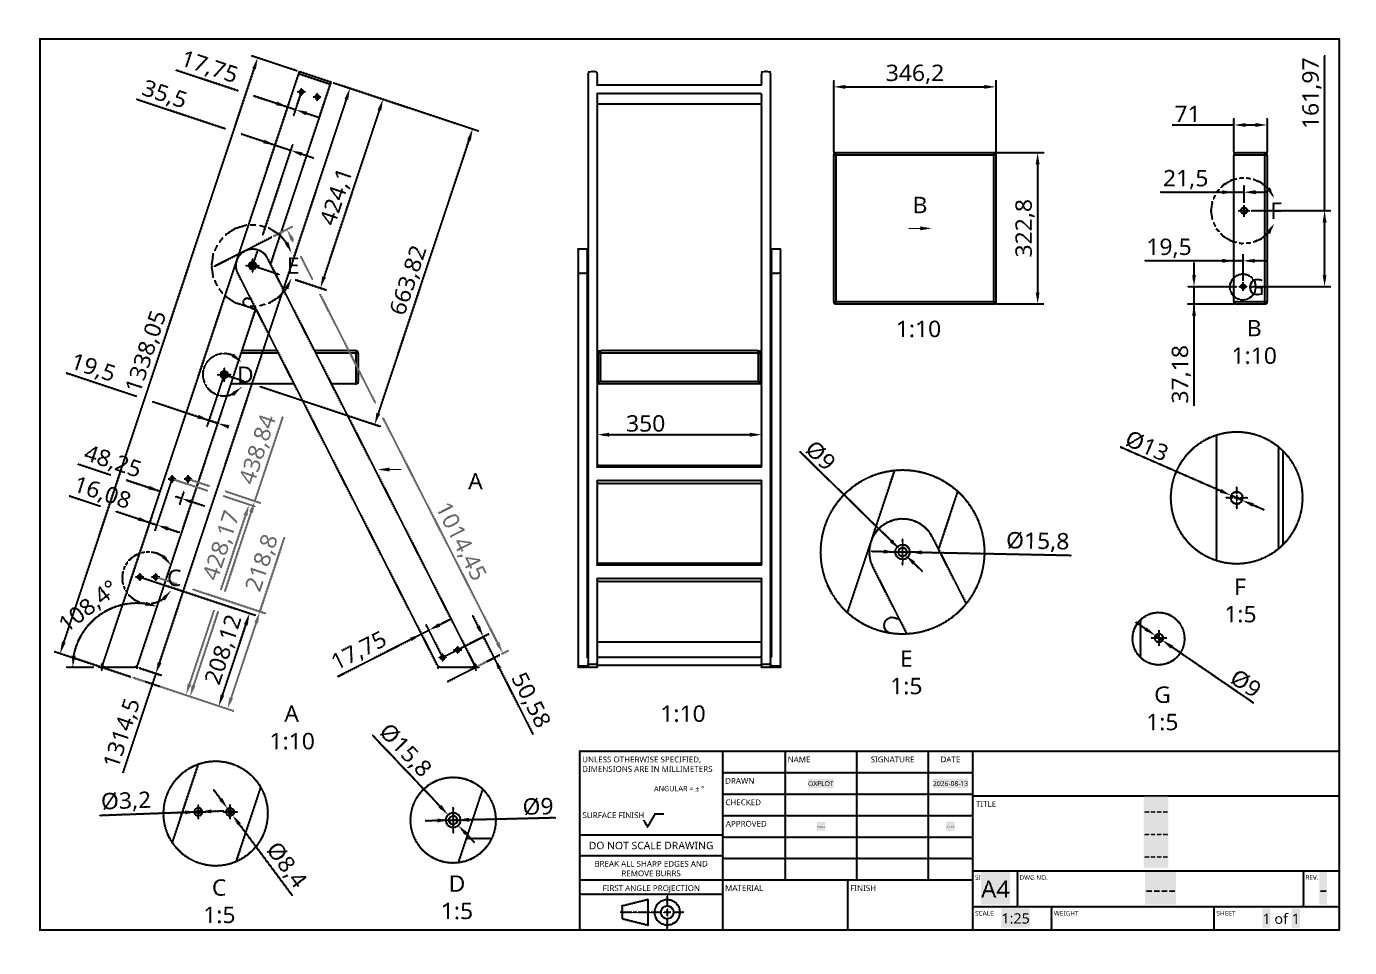
The working drawing. Having the angles and hole positions available to check was especially useful when the build resumed after a long pause.
Print the difficult part
Using the router for the first time was intimidating. The ladder needed several routed slots, and I had no desire to learn freehand routing on the pieces I’d just cut.
So I designed and 3D-printed templates for them. The model already contained the geometry I needed; I could use it to make a physical guide for the tool. That made the routing much simpler and much less frightening.
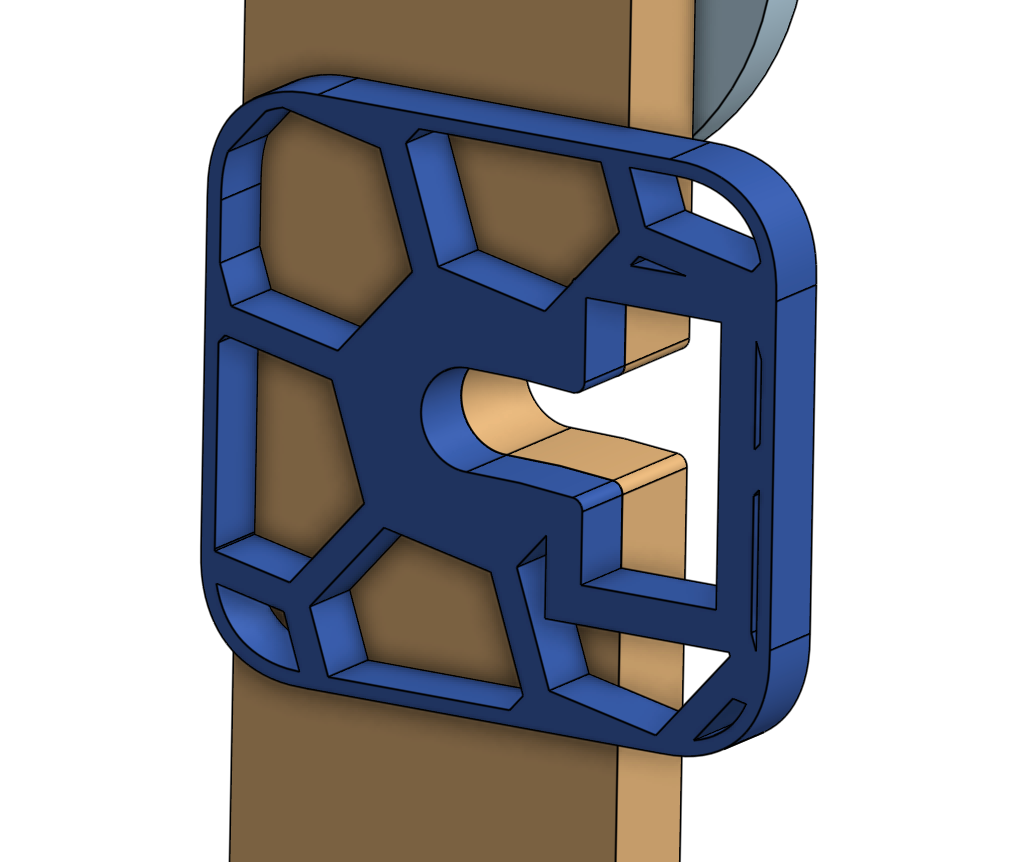
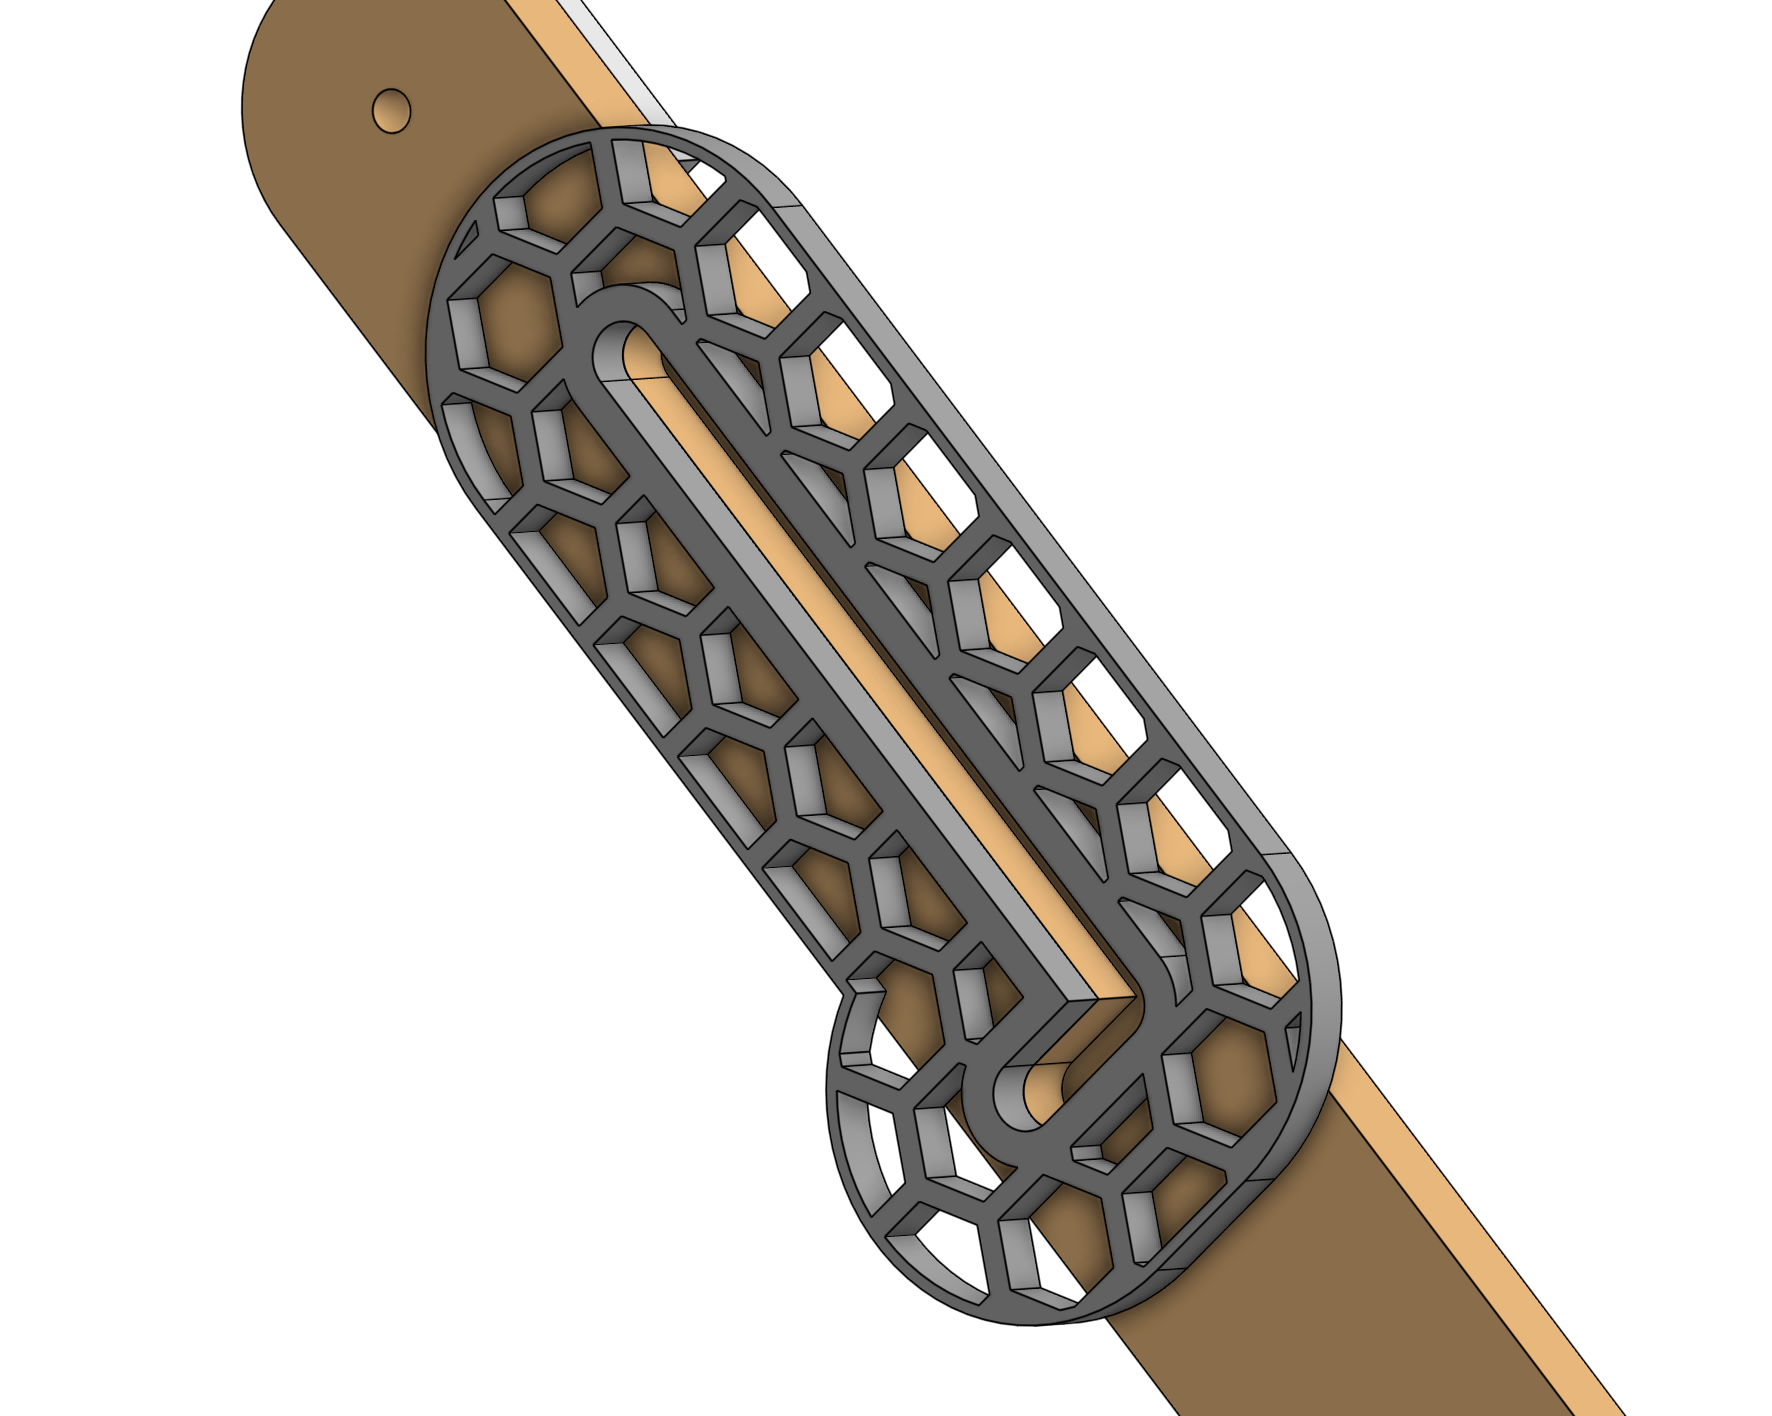
The open-ended slot and long-slot templates, shown on their workpieces in CAD.
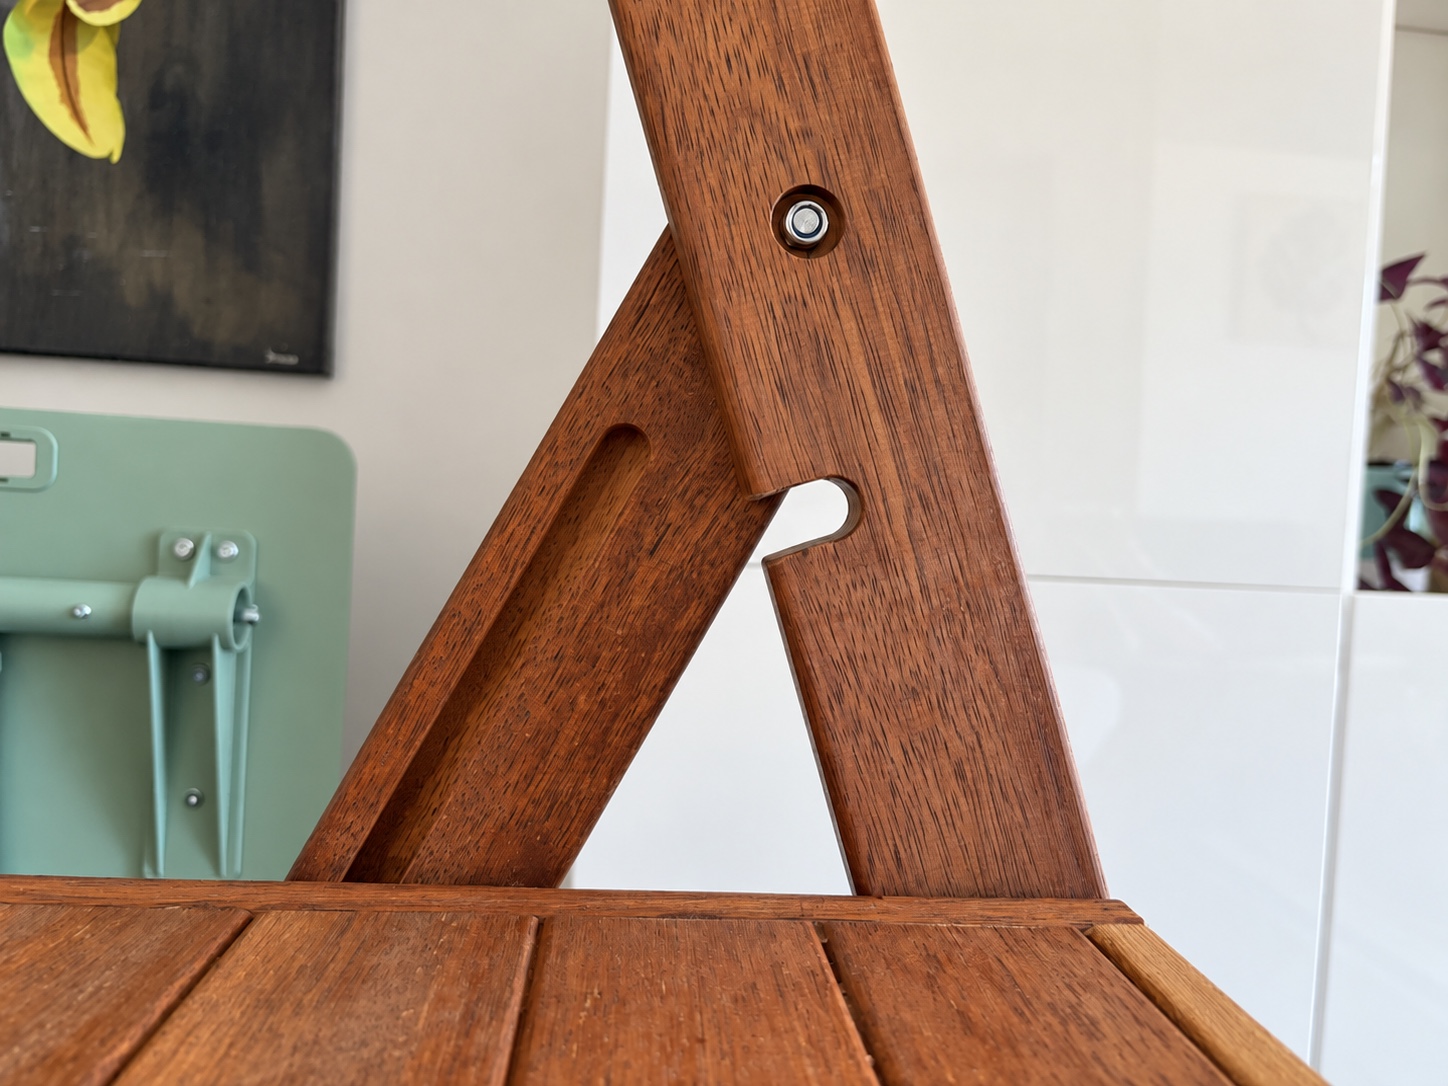
The slots in the actual timber. The platform’s crossbar works with these features as the ladder opens and folds.
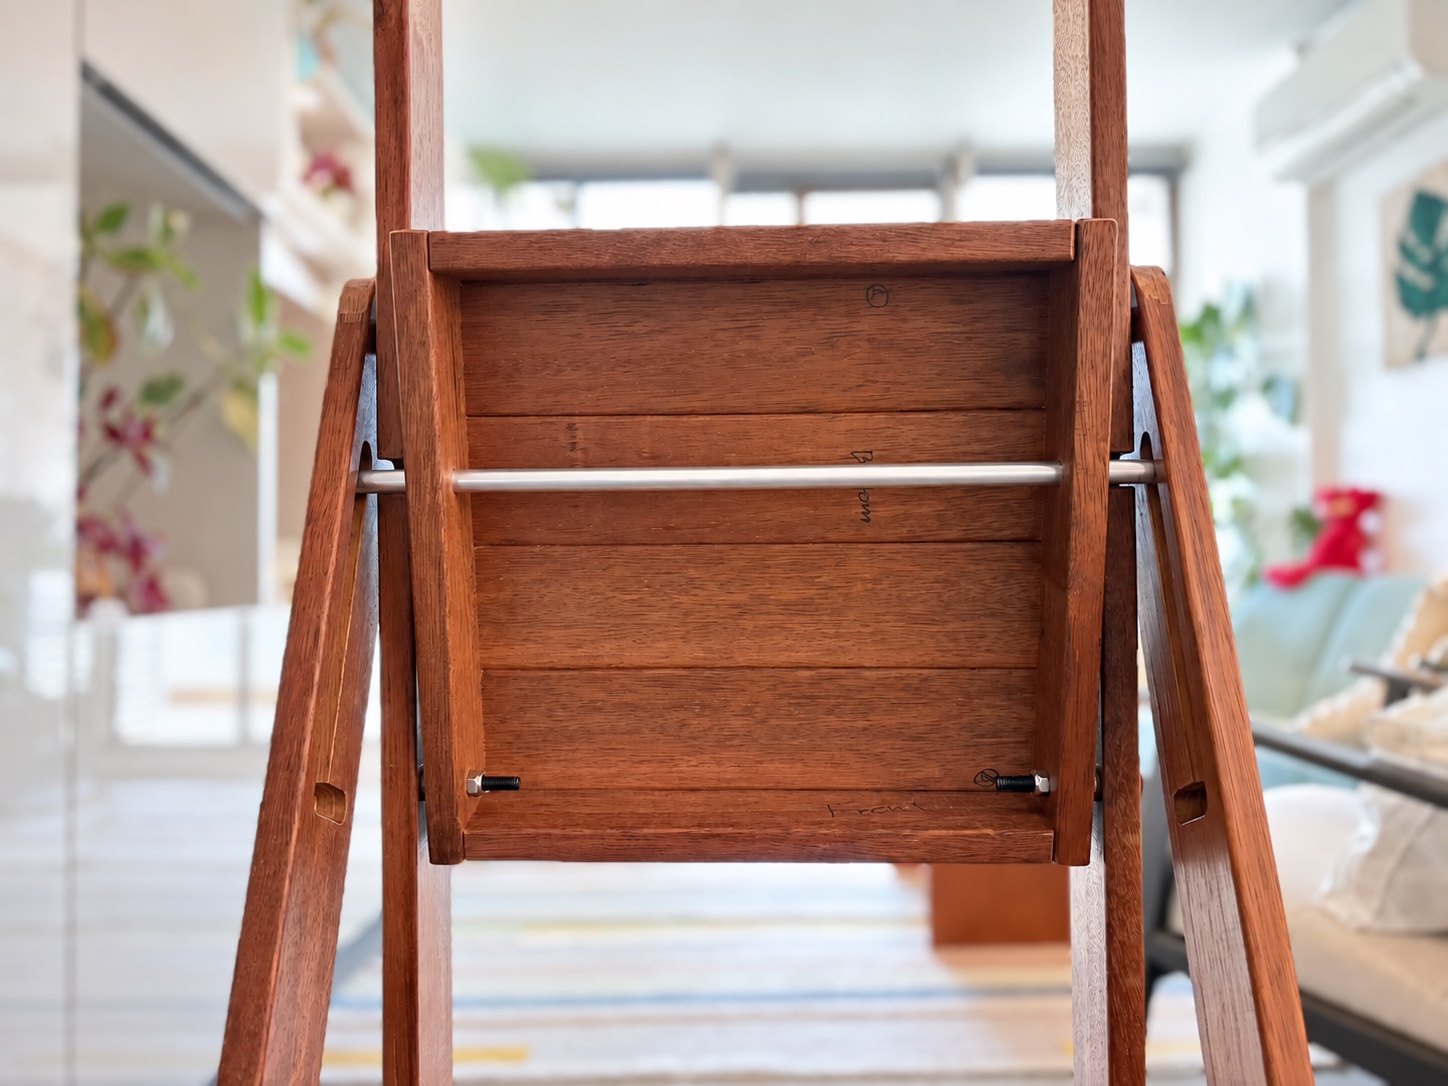
Under the platform: the crossbar, pivot bolts and pencil marks still waiting for the final sanding.
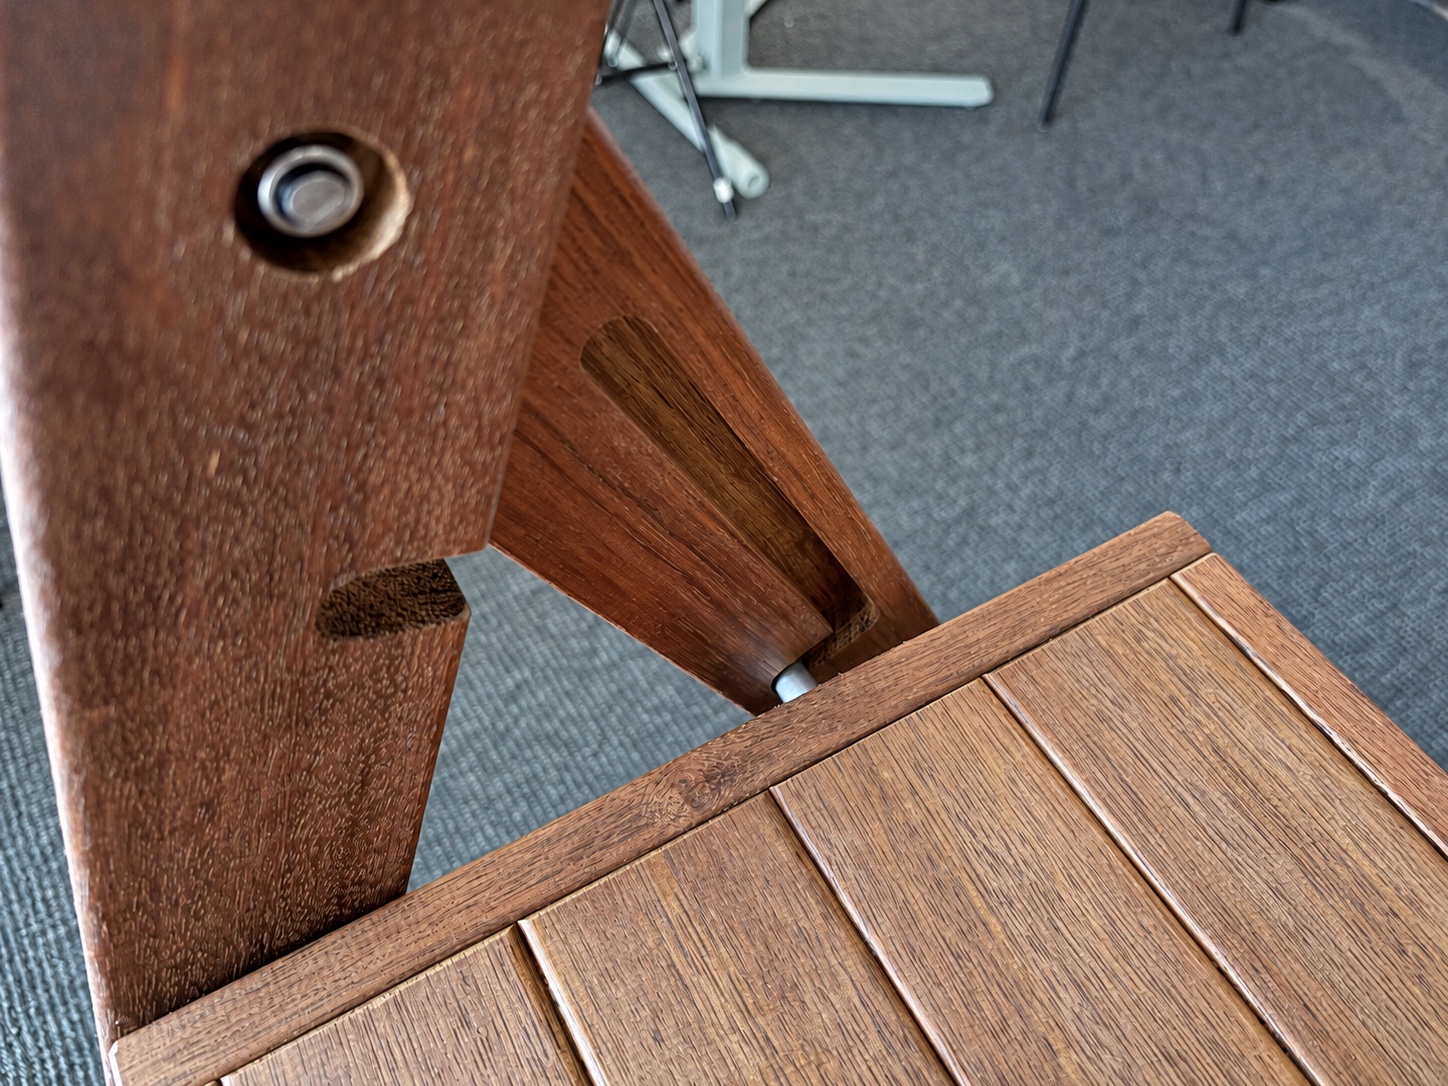
The end of the crossbar entering the rear-leg slot, seen from above.
Good to be a generalist. CAD, 3D printing and woodworking were all helping with the same operation. The printer made a tool for the router; the router made the part for the ladder.
I changed a few things as I went. Having an accurately dimensioned model remained useful throughout: checking an angle, checking a measurement, checking whether what I was about to do made sense. It was a reference I could return to instead of repeatedly reconstructing the design in my head.
The parts I changed
The original’s top bar sits flush with the tops of the side rails. I lowered mine slightly, leaving the rails standing proud at either end. I wanted my hands to feel where the bar ends, with a physical edge to help keep them from sliding off.
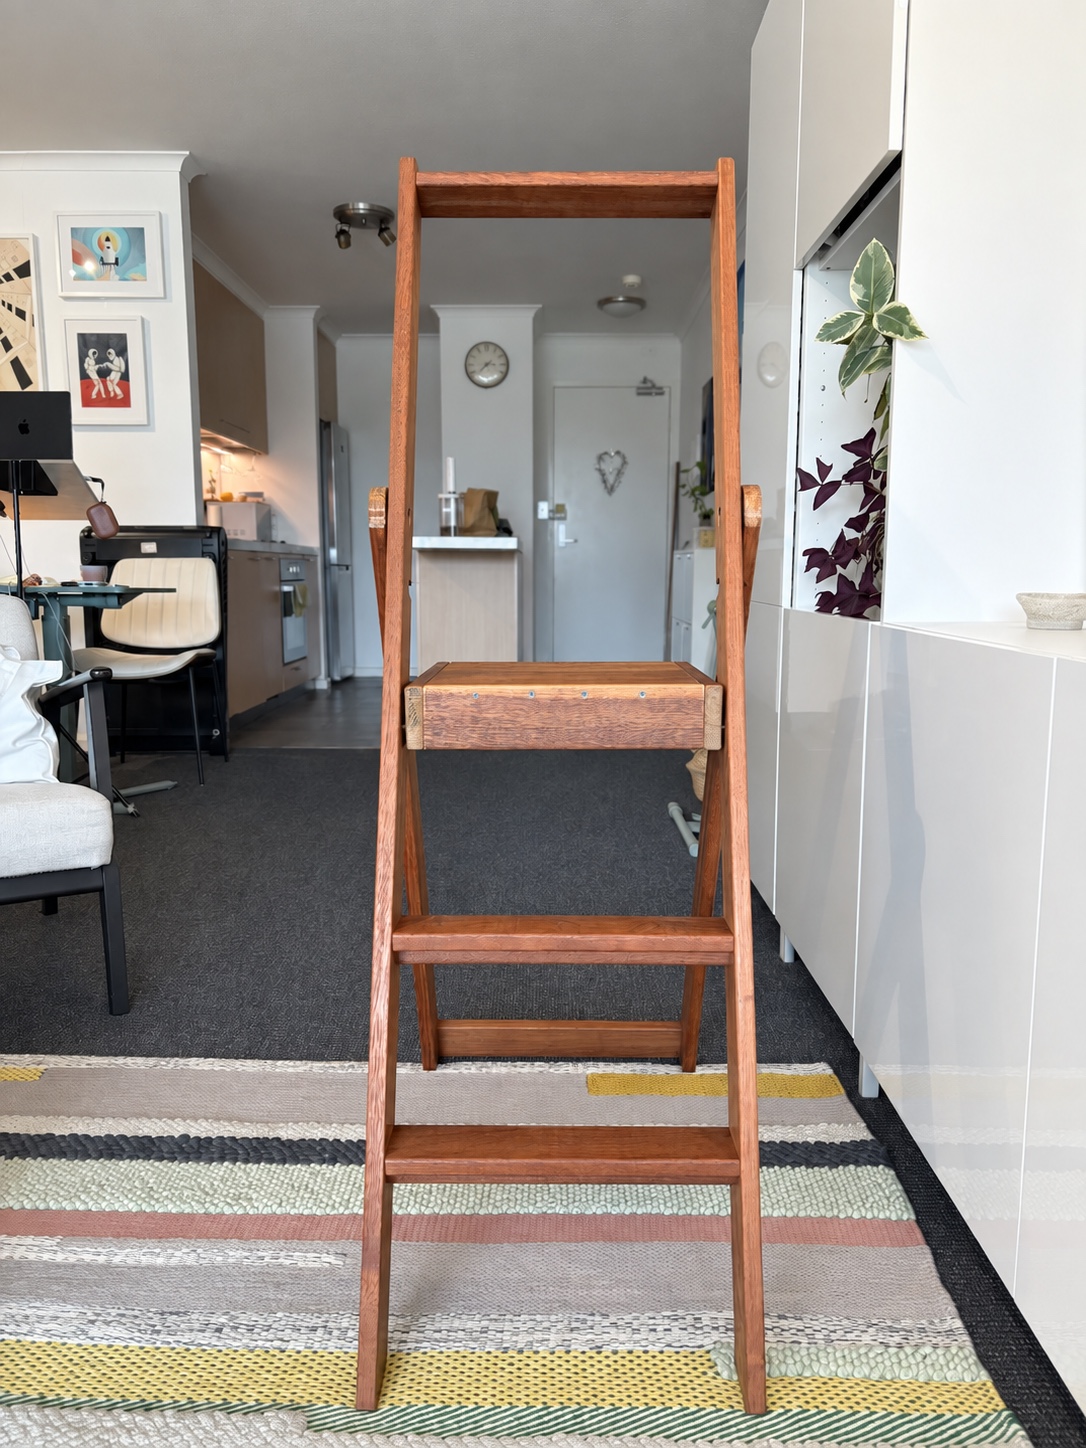
The top bar sits below the ends of the side rails. The two lower steps are mounted at an angle to the rails so their surfaces are level when open.
For the lower steps, I changed how the horizontal tread surface is obtained. Instead of carving that surface into the timber, I installed each step at the angle that makes it horizontal when the ladder is open. That suited the stock and removed a shaping operation.
I also rounded the top of each rear leg around its pivot, so a corner doesn’t poke out past the front of the adjoining rail.
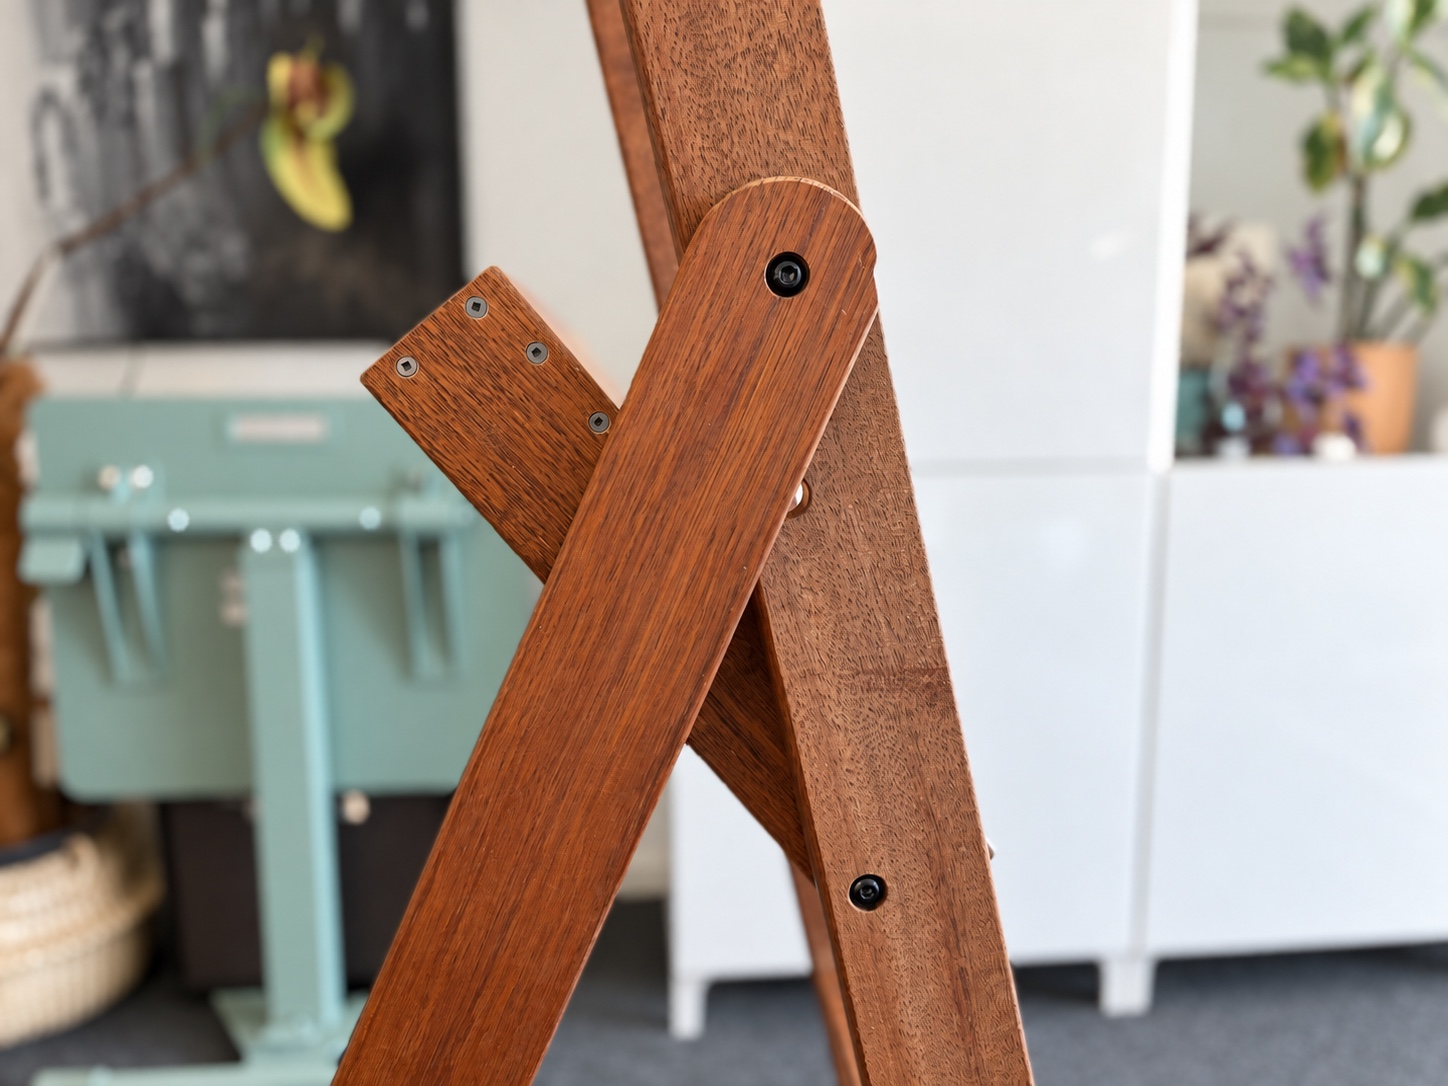
The rounded pivot and the visible fasteners. Neither needs hiding.
And I used visible screws. I wasn’t interested in hiding every fastener or gluing everything together to make the construction disappear. The screws look perfectly fine to me.
Seventy dollars and one board for the bin
I used six of the seven boards. The seventh was warped as fuck and is going in the bin. The material bill came to about A$70, including the timber, bolts, nuts, washers and plastic for the printed templates.
That figure does not include the new tools. Obviously. The Festool purchases belong to a considerably less economical story, and to the projects that come after this one.
The ladder is heavy, and it feels sturdy under me. It gives me much more confidence than the two shop examples did, but I haven’t load-tested it or established a load rating. The movement simulation checked the mechanism, not its strength.
There’s still sanding to do, probably some more oiling, and rubber feet to fit. For now, six pieces of cheap fence timber have become the folding ladder I wanted.
Design Philosophy
I need to get things done and finished. If you can do that while perfecting every detail, good for you. I know my limitations. I have to set deadlines for everything, because there is always another detail I could improve and another reason to put off calling something finished.
I wrote about this years ago in Transient ideas and Learning: a concrete, bounded project gets me moving, and waiting for ideal conditions is a good way to lose the project altogether. This ladder spent almost a year sitting in CAD. I don’t need much more evidence of how that happens to me.
In my line of work and in my life, getting things done is a hundred times more important than craftsmanship. That means making tradeoffs. I spent time on the geometry and made templates where accuracy mattered. I accepted visible screws, cheap timber and a finish that still needs work. I have to choose where the effort goes if I want the whole thing to exist.
A deadline also means leaving some things to work out later. The remaining sanding, oiling and feet are a concrete list I can finish; “make it perfect” has no end. I want to get through that list, use the ladder and move on to the next thing. Every project cannot become a lifetime’s study of its craft.